Have an unsolved diagnostic problem in your bay?

Don't swap expensive parts on a guess. Tell us what the vehicle is doing and what you've already tried. Fellow technicians and diagnostic specialists in the OYENA community will help pinpoint the right physical check or circuit test before you or your customer buy another component.

Submit a Tough Bay Case

Provide the observable symptoms, DTCs, and tests already conducted. Zero VIN or customer PII required.

For technician triage and verification updates.

✔ Case Logged & Queued

Your fault description has been safely recorded.

Open WhatsApp Diagnostic Desk →

Real faults. Physical evidence. Proven fixes.

A searchable body of verified workshop diagnostic investigations. Step-by-step diagnostic reasoning, live scan tool data, and zero-waste mechanical and circuit repairs.

DIAGNOSTIC REFERENCE #164 Verified Bay Investigation

Why a Mercedes GL Airmatic warning is rarely a dead compressor

How an unverified cluster warning led to repeated unnecessary part replacements at previous workshops—and how a 45-minute physical circuit test resolved the fault without buying a single new part.

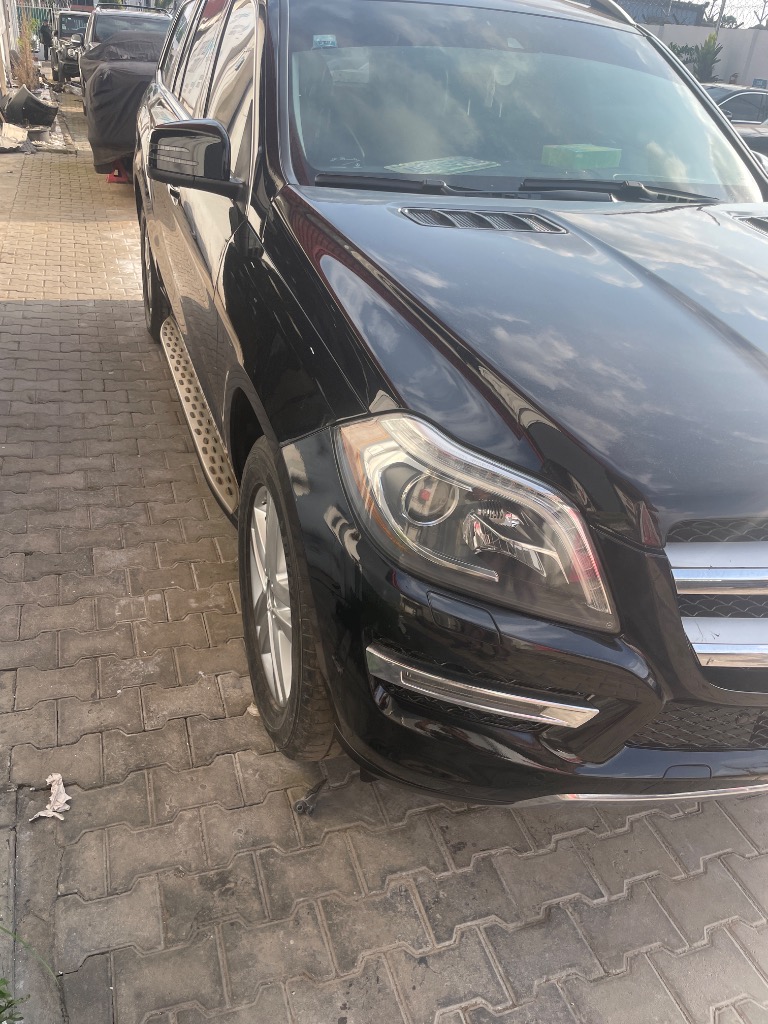
Vehicle 2013 GL450
Prior Replacements Compressor & Bags Swapped
Physical Root Cause Widened Socket Leaves
Actual Fix Cost ₦0 in New Parts

The Cold-Start Trap

The Mercedes-Benz GL450 arrived bottomed out on all four wheels. Turn the key in the morning, and before the engine has run even 30 seconds at 24°C ambient temperature, the instrument cluster displays:
"Airmatic Malfunction — Compressor Cooling Down".

Two previous workshops had already replaced the air compressor pump and rear air bags without success. When the brand new pump still refused to turn on, the technician prepared to recommend an expensive air suspension valve block.

Why the scanner misled the previous shops

When the central gateway or Airmatic ECU flags "Compressor Cooling Down" on a cold start, it is not measuring temperature with a physical thermometer. It is running an algorithmic thermal model based on commanded motor speed and circuit resistance. If current cannot pass freely through the circuit, the ECU deduces that the motor is laboring under extreme heat—and locks it out to prevent fire.

Why the Standard Multimeter Lied

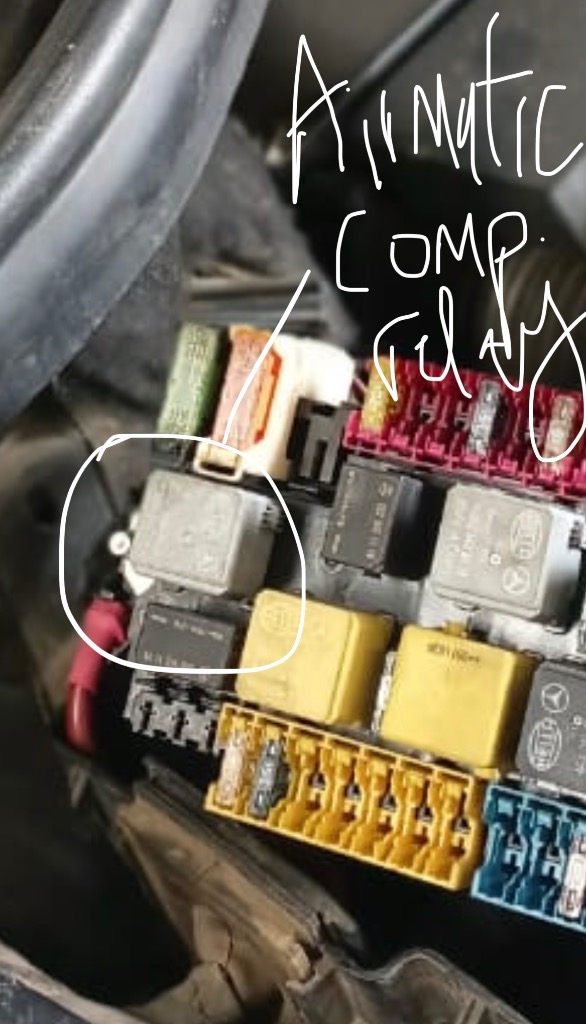
Most technicians pull the compressor relay, stick multimeter test probes into socket Pin 30, and see 12.4V. They conclude: "Power is reaching the socket. The relay feed is healthy."

That is the single most expensive assumption in automotive diagnostics. A multimeter draws mere microamps. Even a wire hanging by a single corroded copper strand will show 12V with no electrical load attached.

The 55W Loaded Headlight Bulb Test

Instead of trusting high-impedance voltage meter readings, OYENA's protocol requires testing the circuit under real current demand:

  • Connect a standard H7 55W halogen headlight bulb across Pin 30 (constant battery supply) and battery ground.
  • A 55W bulb demands approximately 4.5 Amperes of continuous current.
  • Under this modest electrical load, the socket voltage instantly collapsed to 4.2 Volts. The bulb barely glowed.
The Physical Defect Found

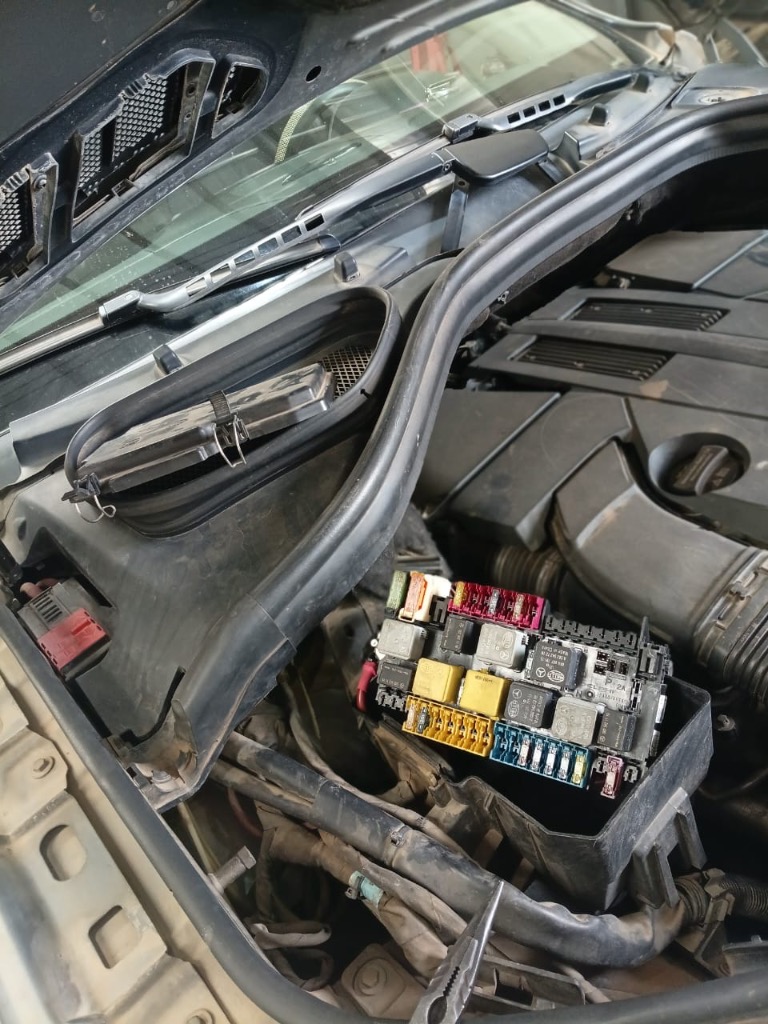
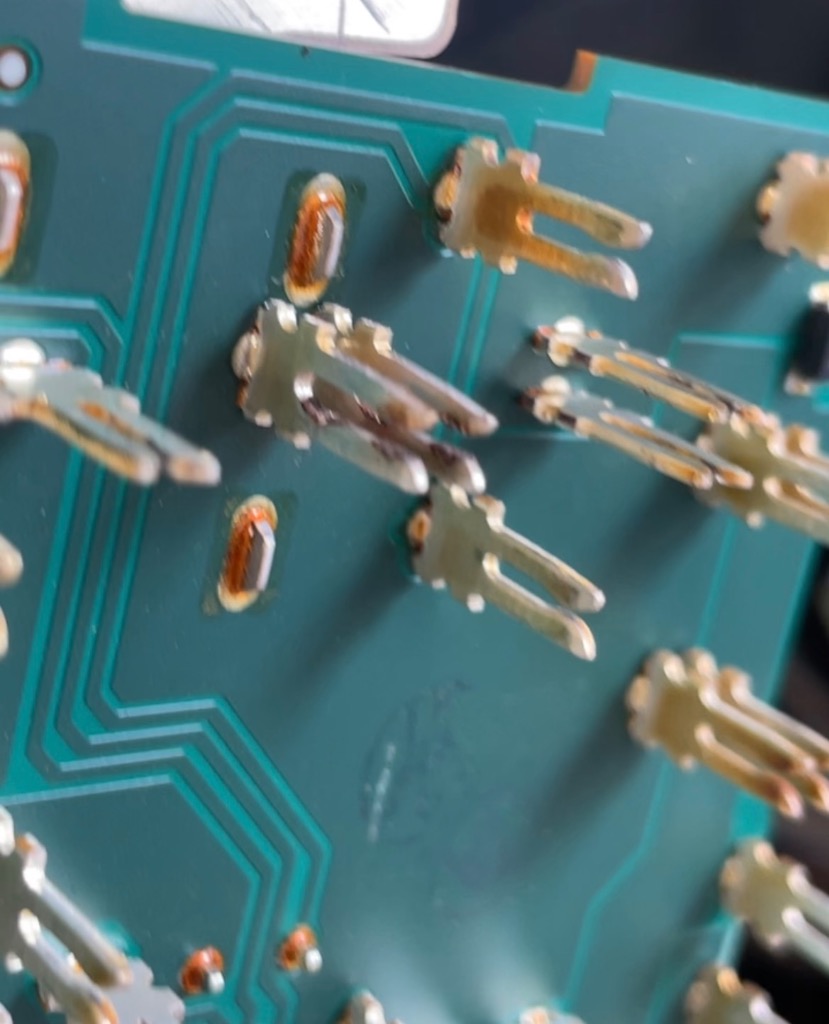
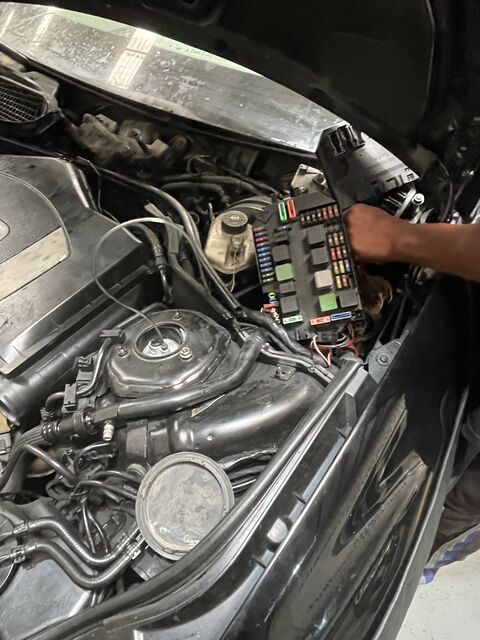
Inspecting the female receptacle terminal inside the front SAM fuse/relay box revealed that the internal spring-loaded contact leaves for Pin 30 and Pin 87 had widened. When the relay was inserted, the pins had zero mechanical drag. The high-amperage compressor motor had suffered from severe contact resistance, not a motor failure.

The Zero-Part Resolution

Using terminal pick tools, the female socket leaves were carefully re-tensioned to restore firm mechanical grip. The 55W load test was repeated: a solid 12.35V with zero voltage drop.

The original relay was reinstalled. The air compressor engaged immediately, pressurized the reservoir, and raised all four corners of the GL450 to factory ride height. The car has remained level with zero recurring warnings for over 60 days.

Showing 15 verified workshop cases Filter: All
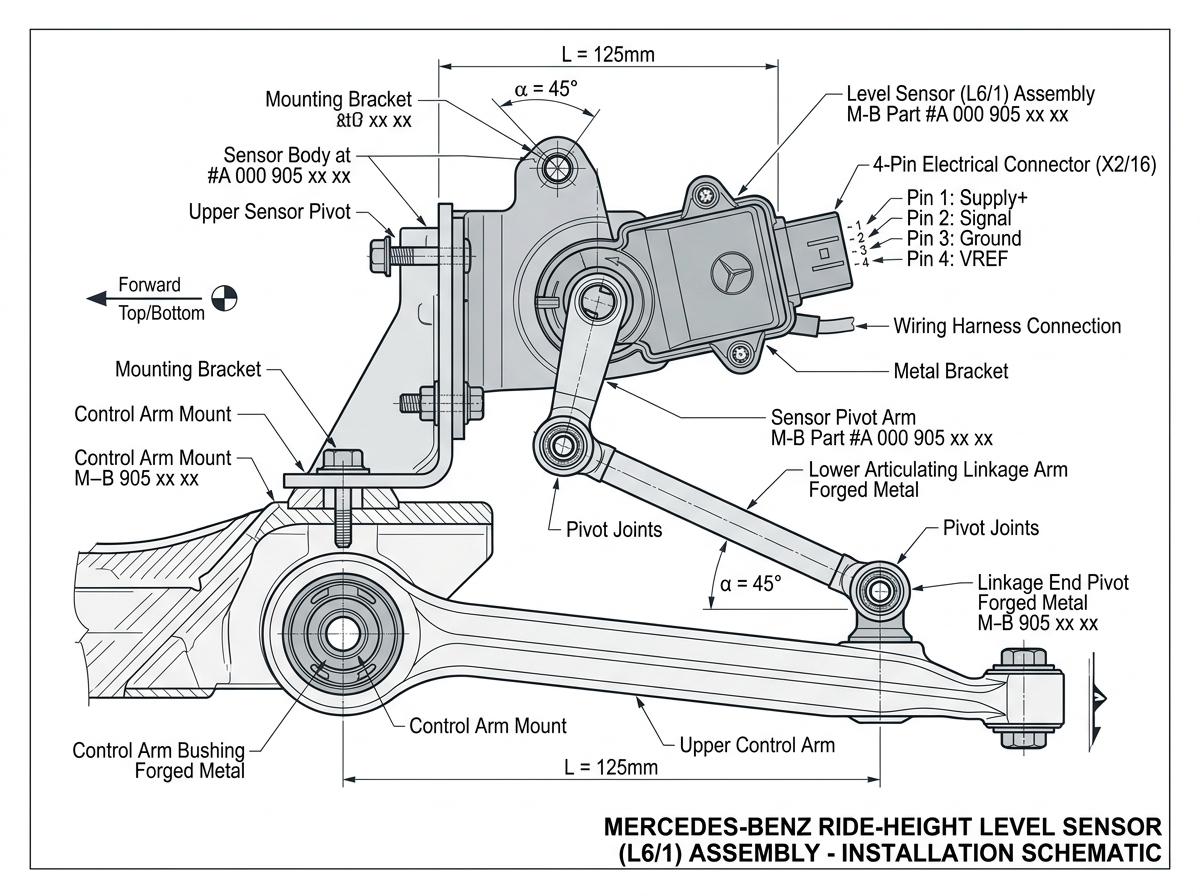
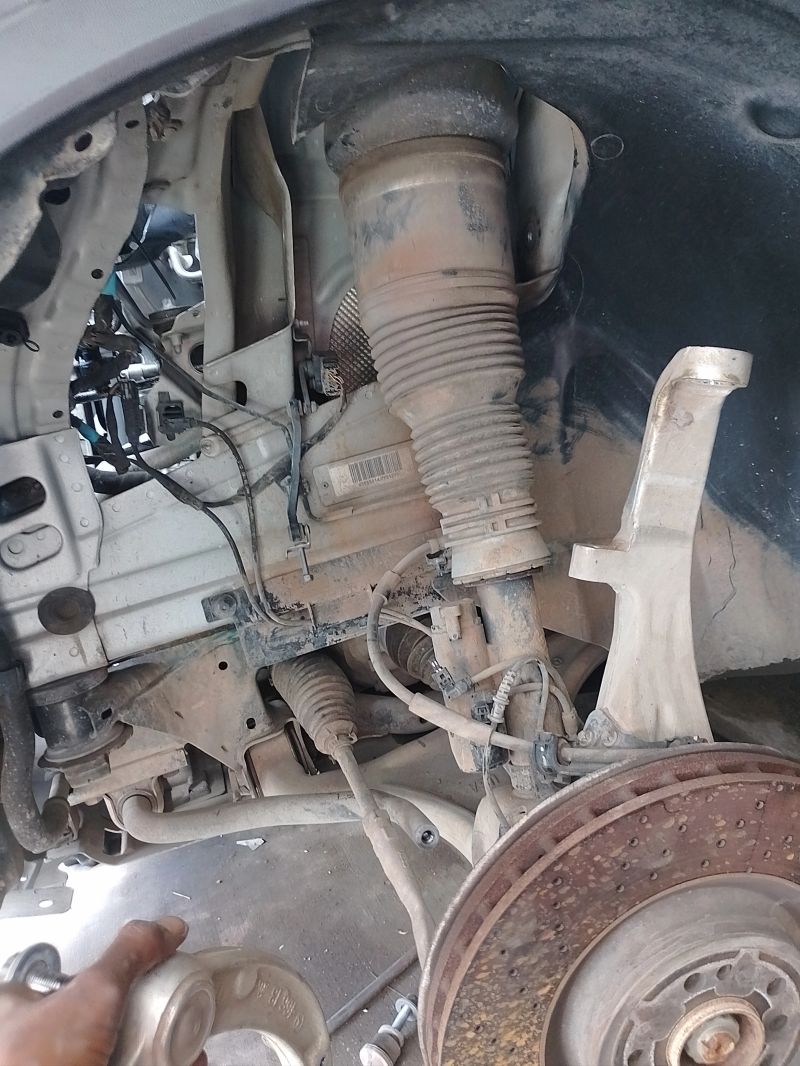
Front Suspension Ride Height Sensor Mounting
GEOMETRY 📷 2 Workshop Photos
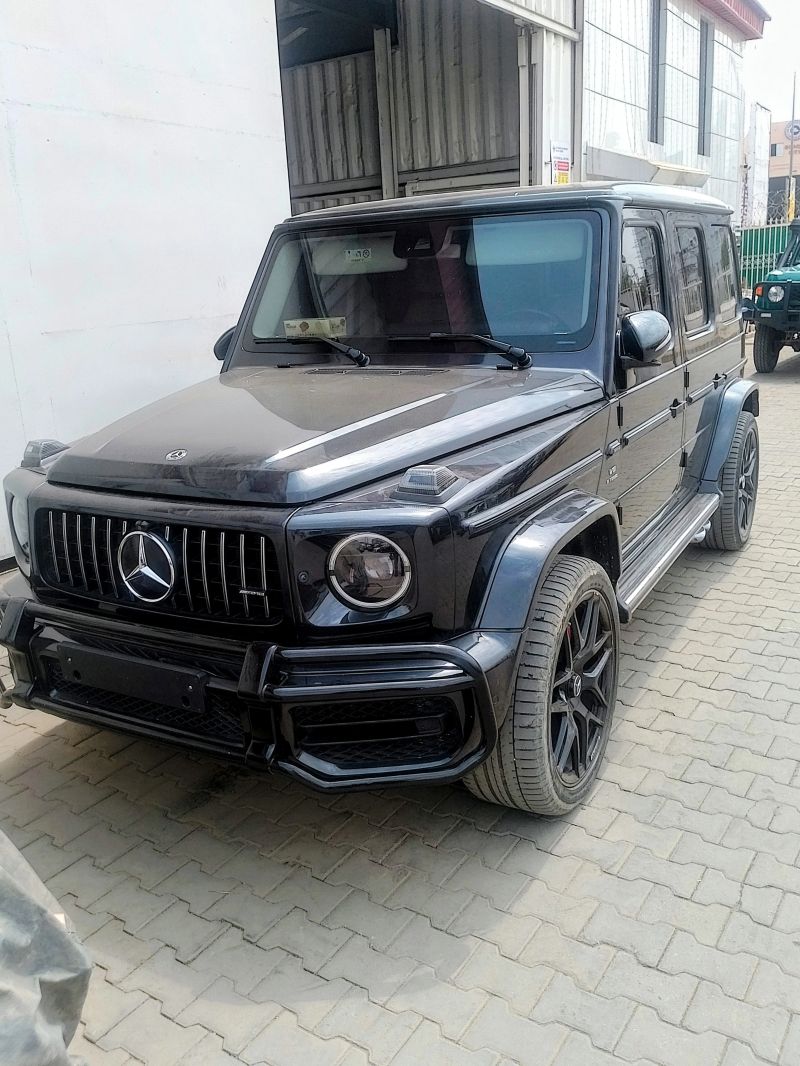
2019 Mercedes-Benz G63 AMG Suspension & Chassis

Dashboard warning "Do not exceed 80 km/h". ADS suspension calibration refused through scan tool.

✕ Avoided: Zero sensors or control units replaced
The Costly Guess: Suspected multiple failed ride height sensors or defective ADS chassis control module.
Physical Test: Monitored live height sensor voltages on a drive-on lift. When suspension extended upward, front readings jumped in reverse and mirrored each other symmetrically.
Real Cause & Fix: Both front ride height level sensors were physically installed upside down (inverted). The ECU saw impossible geometry and engaged speed protection. — Unbolted and re-installed both front level sensors in correct mechanical orientation. Suspension calibration passed on first attempt.
The Physical Diagnostic Trail
1
Vehicle Intake & Symptoms:

Dashboard warning "Do not exceed 80 km/h". ADS suspension calibration refused through scan tool. (W463 Chassis).

2
What Others Guessed (The Expensive Trap):

Suspected multiple failed ride height sensors or defective ADS chassis control module.

3
The Physical Test Performed:

Monitored live height sensor voltages on a drive-on lift. When suspension extended upward, front readings jumped in reverse and mirrored each other symmetrically.

4
The Verified Zero-Waste Fix:

Unbolted and re-installed both front level sensors in correct mechanical orientation. Suspension calibration passed on first attempt.

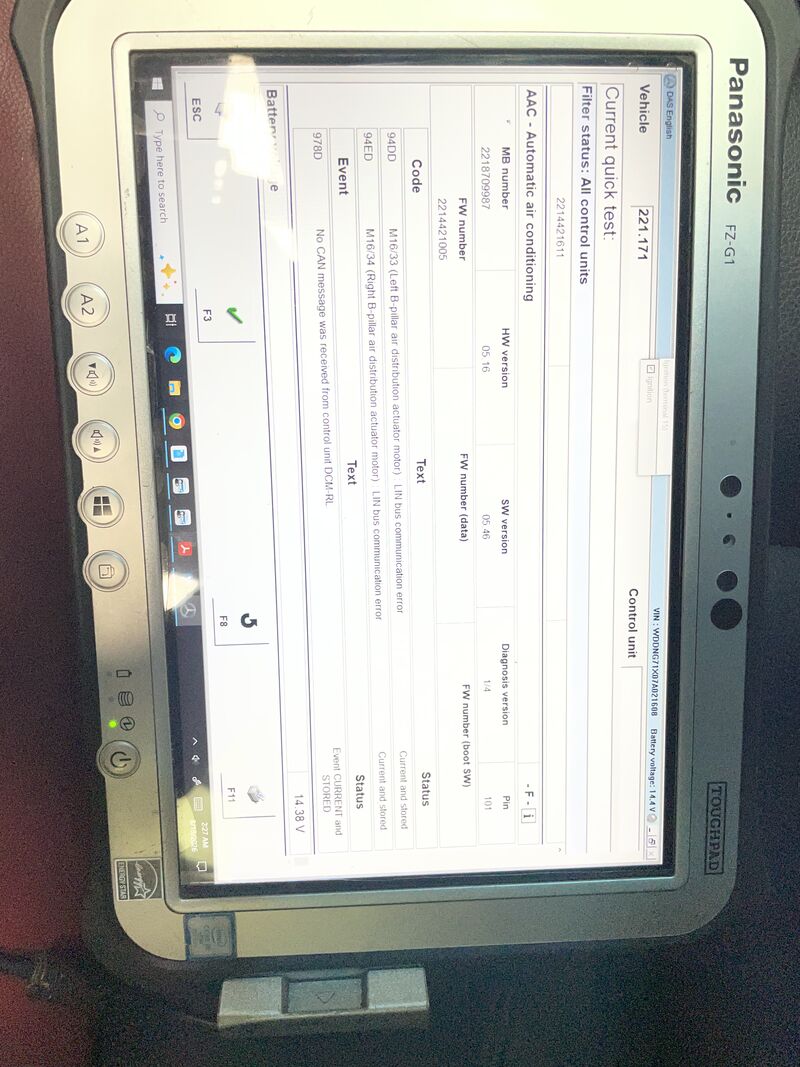
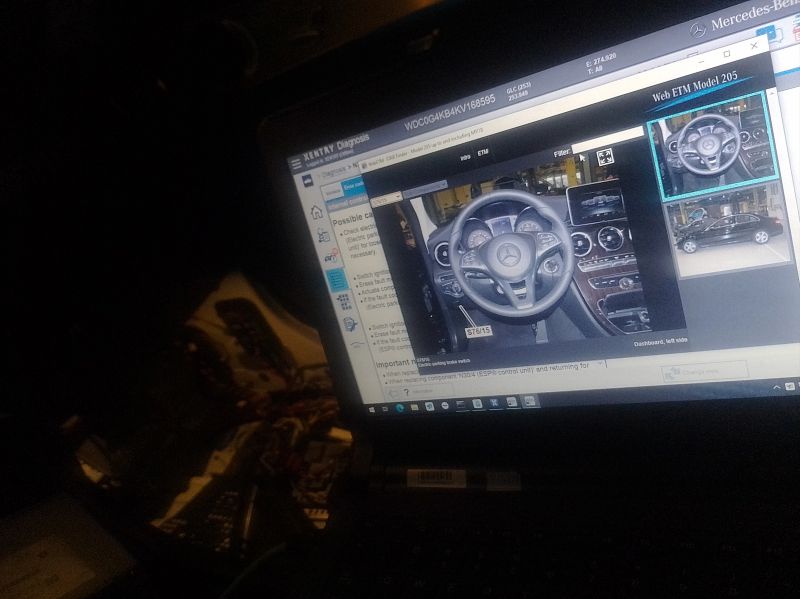
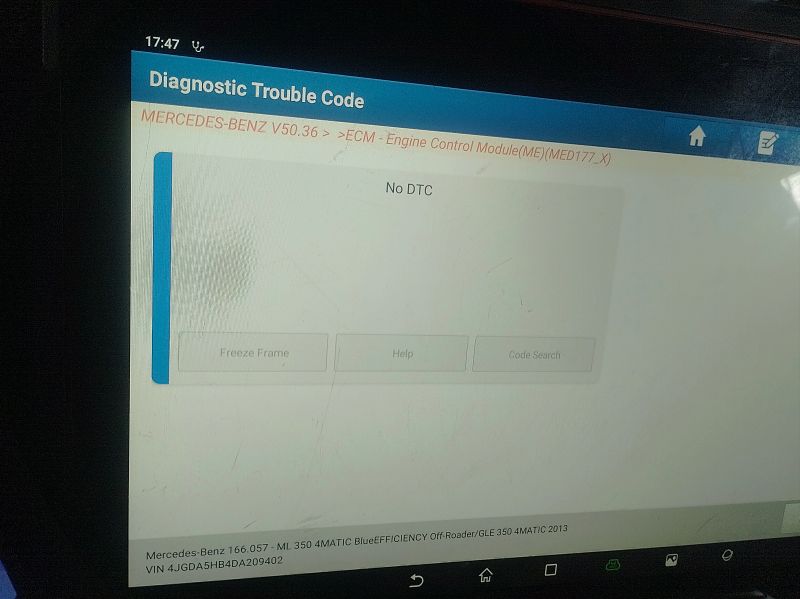
Toughpad XENTRY Diagnostic Interface
MULTIMETER CIRCUIT 📷 3 Workshop Photos
2007 Mercedes-Benz S550 HVAC & Thermal

A/C blowing warm air. Compressor valve/clutch refused to engage despite sufficient refrigerant pressure.

✕ Avoided: No further parts condemned
The Costly Guess: Previous workshops replaced compressor, condenser, and Front SAM unit without resolving the issue.
Physical Test: Connected Toughpad running DAS/XENTRY. Back-probed compressor signal wire with a digital multimeter while commanding actuation.
Real Cause & Fix: Burnt clamping diode on the Front SAM circuit board plus an unplugged ambient temperature sensor causing command inhibit. — Soldered a replacement diode onto the Front SAM PCB and reconnected the ambient sensor. Compressor engaged immediately, delivering ice-cold air.
The Physical Diagnostic Trail
1
Vehicle Intake & Symptoms:

A/C blowing warm air. Compressor valve/clutch refused to engage despite sufficient refrigerant pressure. (W221 Chassis).

2
What Others Guessed (The Expensive Trap):

Previous workshops replaced compressor, condenser, and Front SAM unit without resolving the issue.

3
The Physical Test Performed:

Connected Toughpad running DAS/XENTRY. Back-probed compressor signal wire with a digital multimeter while commanding actuation.

4
The Verified Zero-Waste Fix:

Soldered a replacement diode onto the Front SAM PCB and reconnected the ambient sensor. Compressor engaged immediately, delivering ice-cold air.

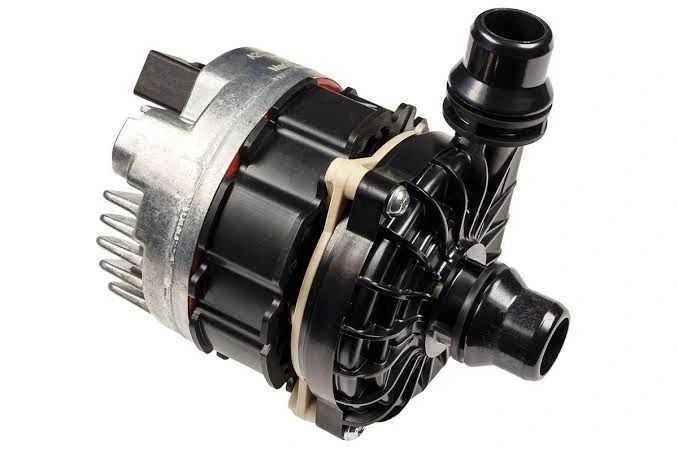
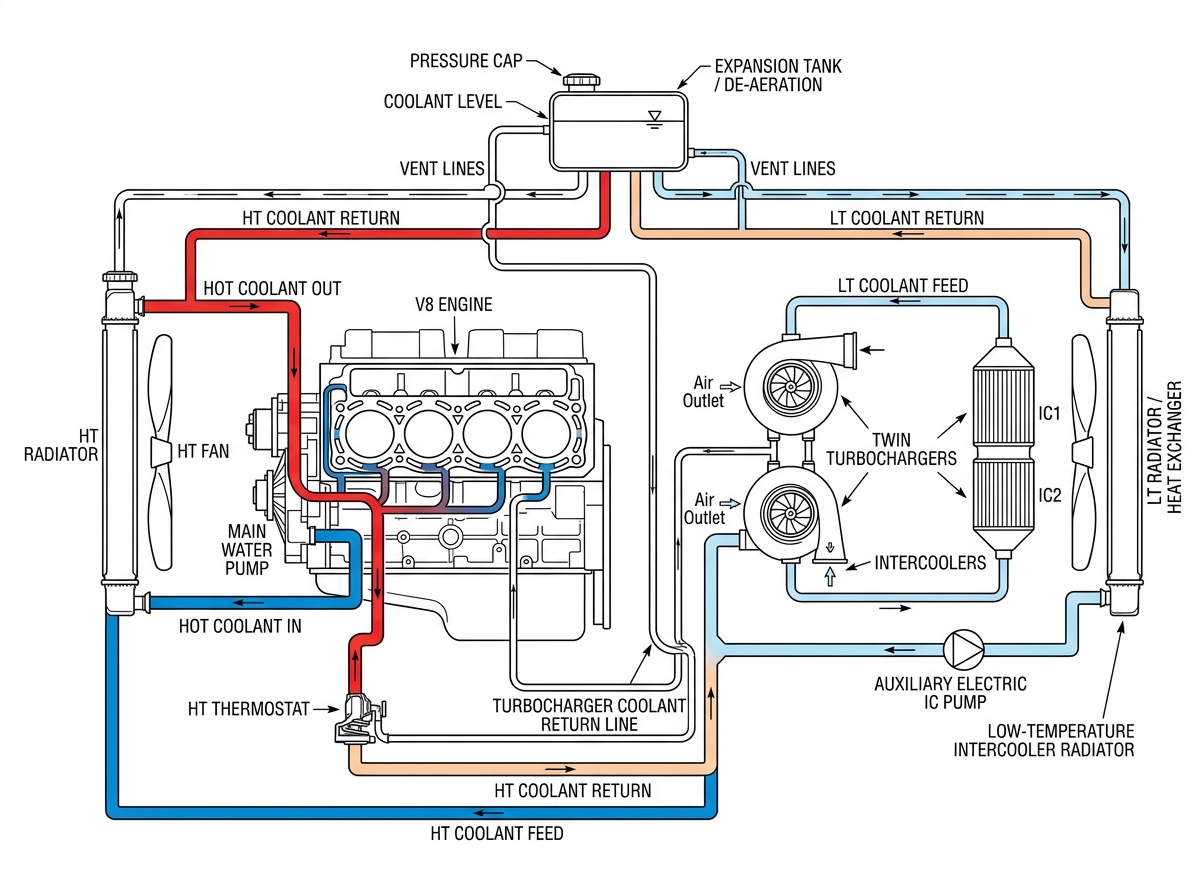
Low-Temperature Auxiliary Coolant Pump
LOAD HEAT-SOAK 📷 4 Workshop Photos
Mercedes-Benz W213 (E-Class) HVAC & Thermal

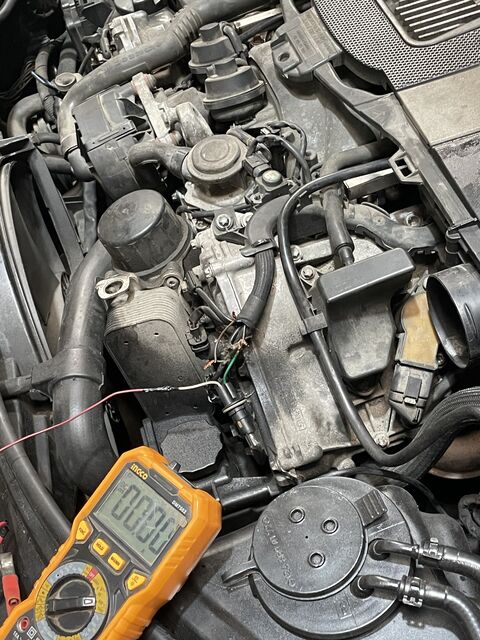
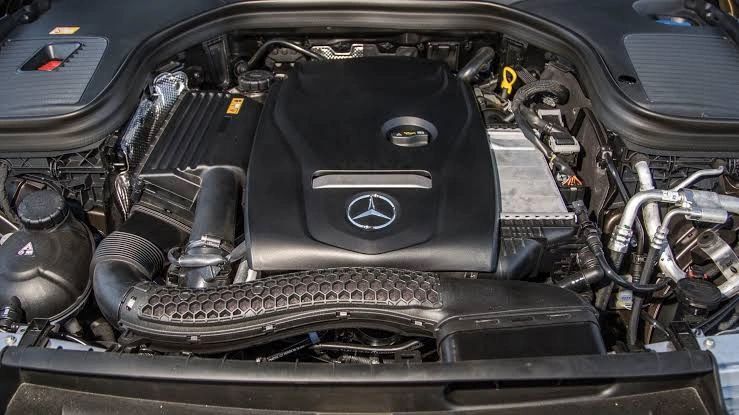
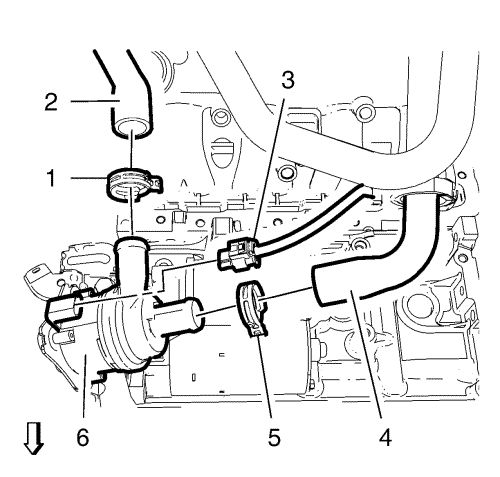
Intercooler low-temperature auxiliary coolant pump randomly shuts off only when the engine reaches full operating temperature.

✕ Avoided: Saved new auxiliary pump replacement
The Costly Guess: Zero fault codes stored. Assumed an intermittent internal pump motor seizure or loose fuse.
Physical Test: Monitored supply voltage at the pump harness connector while heating the engine bay to full operating temperature under load.
Real Cause & Fix: Internal copper strand degradation inside the wiring harness; wire built excessive resistance only under engine bay heat soak, dropping voltage to the pump. — Constructed and routed a clean, dedicated fused power feed bypassing the degraded section. Pump operated continuously through high-temperature road testing.
The Physical Diagnostic Trail
1
Vehicle Intake & Symptoms:

Intercooler low-temperature auxiliary coolant pump randomly shuts off only when the engine reaches full operating temperature. (W213 Chassis).

2
What Others Guessed (The Expensive Trap):

Zero fault codes stored. Assumed an intermittent internal pump motor seizure or loose fuse.

3
The Physical Test Performed:

Monitored supply voltage at the pump harness connector while heating the engine bay to full operating temperature under load.

4
The Verified Zero-Waste Fix:

Constructed and routed a clean, dedicated fused power feed bypassing the degraded section. Pump operated continuously through high-temperature road testing.

Fender Wire Harness Damage
CIRCUIT TRACE 📷 4 Workshop Photos
2019 Mercedes-Benz G63 AMG Drivetrain & Transmission

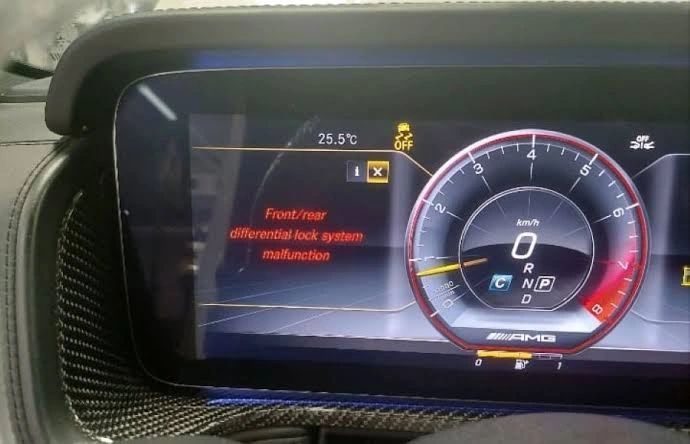
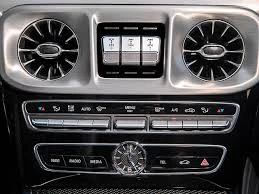
All three differential lock switches completely dead; ABS and Traction Control warning lights illuminated.

✕ Avoided: Zero transfer case or diff actuators replaced
The Costly Guess: Suspected dead differential lock controller or failed front and rear mechanical lock actuators.
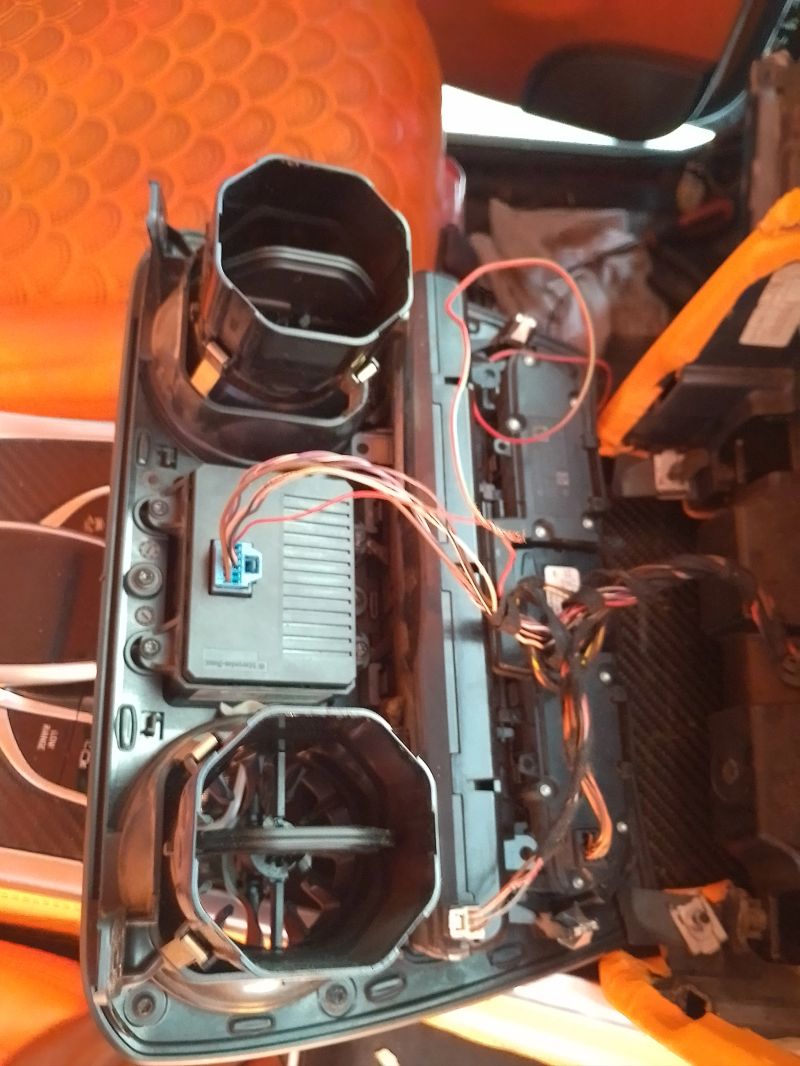
Physical Test: Scanned with XENTRY; actuator commands failed. Retraced body harness behind fender looking for prior mechanical disturbances.
Real Cause & Fix: A severed power supply wire hidden behind the inner wheel arch from an earlier body/fender repair. — Reconnected the severed harness with environmental solder-seal connectors and installed a new 10A protection fuse. All three locks engaged smoothly.
The Physical Diagnostic Trail
1
Vehicle Intake & Symptoms:

All three differential lock switches completely dead; ABS and Traction Control warning lights illuminated. (W463 Chassis).

2
What Others Guessed (The Expensive Trap):

Suspected dead differential lock controller or failed front and rear mechanical lock actuators.

3
The Physical Test Performed:

Scanned with XENTRY; actuator commands failed. Retraced body harness behind fender looking for prior mechanical disturbances.

4
The Verified Zero-Waste Fix:

Reconnected the severed harness with environmental solder-seal connectors and installed a new 10A protection fuse. All three locks engaged smoothly.

Electric Steering Rack Connector Inspection
PHYSICAL INSPECTION 📷 3 Workshop Photos
2014 Mercedes-Benz GLK 350 Steering & EPS

Electronic power steering suddenly locked up completely and became unmanageably heavy after driving through standing flood water.

✕ Avoided: Avoided complete electric steering rack replacement
The Costly Guess: Assumed mechanical steering rack seizure or burned electric rack motor requiring complete rack assembly.
Physical Test: Inspected physical connectors at the steering rack base for water entry rather than condemning the entire rack.
Real Cause & Fix: Flood water had forced its way past a aged rubber seal into the torque sensor electrical socket, shorting sensor reference voltage. — Disconnected, thoroughly dried, and cleaned connector pins. Applied dielectric compound, resealed base housing, and ran EPS steering angle relearn. Steering restored to factory fingertip effort.
The Physical Diagnostic Trail
1
Vehicle Intake & Symptoms:

Electronic power steering suddenly locked up completely and became unmanageably heavy after driving through standing flood water. (X204 Chassis).

2
What Others Guessed (The Expensive Trap):

Assumed mechanical steering rack seizure or burned electric rack motor requiring complete rack assembly.

3
The Physical Test Performed:

Inspected physical connectors at the steering rack base for water entry rather than condemning the entire rack.

4
The Verified Zero-Waste Fix:

Disconnected, thoroughly dried, and cleaned connector pins. Applied dielectric compound, resealed base housing, and ran EPS steering angle relearn. Steering restored to factory fingertip effort.

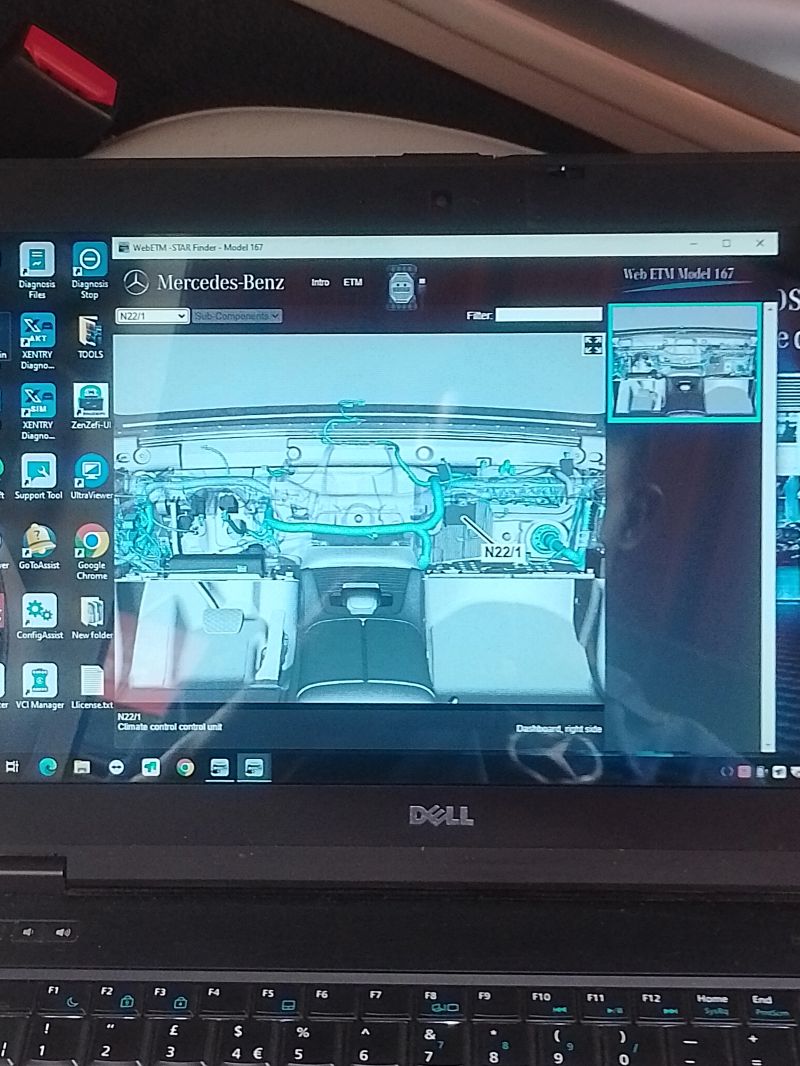
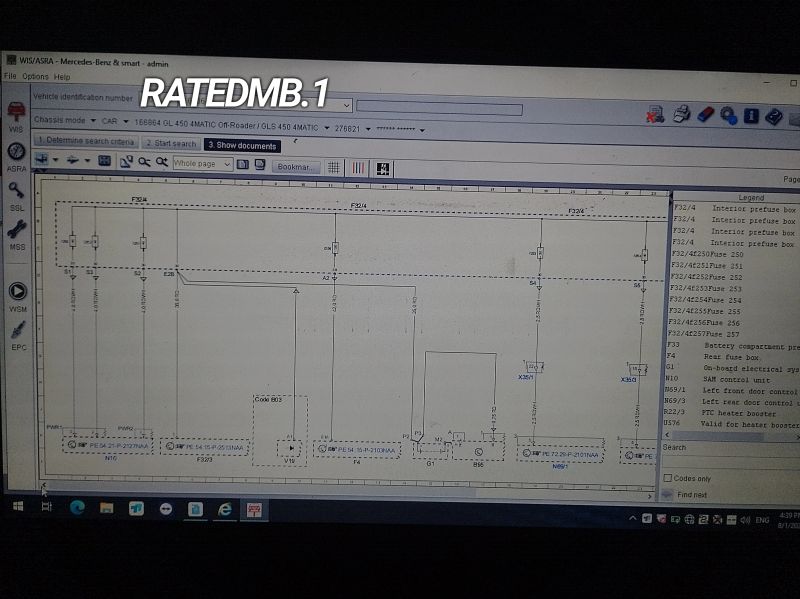
Under-Dash Evaporator Ground Inspection
WIRING SCHEMATIC 📷 3 Workshop Photos
2020 Mercedes-Benz GLE 450 HVAC & Thermal

Air conditioning blows ice cold, then suddenly blasts scorching hot air mid-drive without warning.

✕ Avoided: Avoided 48V compressor replacement
The Costly Guess: Suspected failing 48V electric A/C compressor or slow internal refrigerant leak.
Physical Test: Traced A/C control circuits behind the dashboard and evaporator using StarFinder WebETM electrical schematics.
Real Cause & Fix: Partially burnt ground wire behind the evaporator housing; heating caused ground resistance to float, disabling compressor modulation. — Cleaned ground eyelet corrosion, repaired wire terminal, and securely anchored directly to bare chassis metal. A/C maintained uninterrupted cooling.
The Physical Diagnostic Trail
1
Vehicle Intake & Symptoms:

Air conditioning blows ice cold, then suddenly blasts scorching hot air mid-drive without warning. (W167 Chassis).

2
What Others Guessed (The Expensive Trap):

Suspected failing 48V electric A/C compressor or slow internal refrigerant leak.

3
The Physical Test Performed:

Traced A/C control circuits behind the dashboard and evaporator using StarFinder WebETM electrical schematics.

4
The Verified Zero-Waste Fix:

Cleaned ground eyelet corrosion, repaired wire terminal, and securely anchored directly to bare chassis metal. A/C maintained uninterrupted cooling.

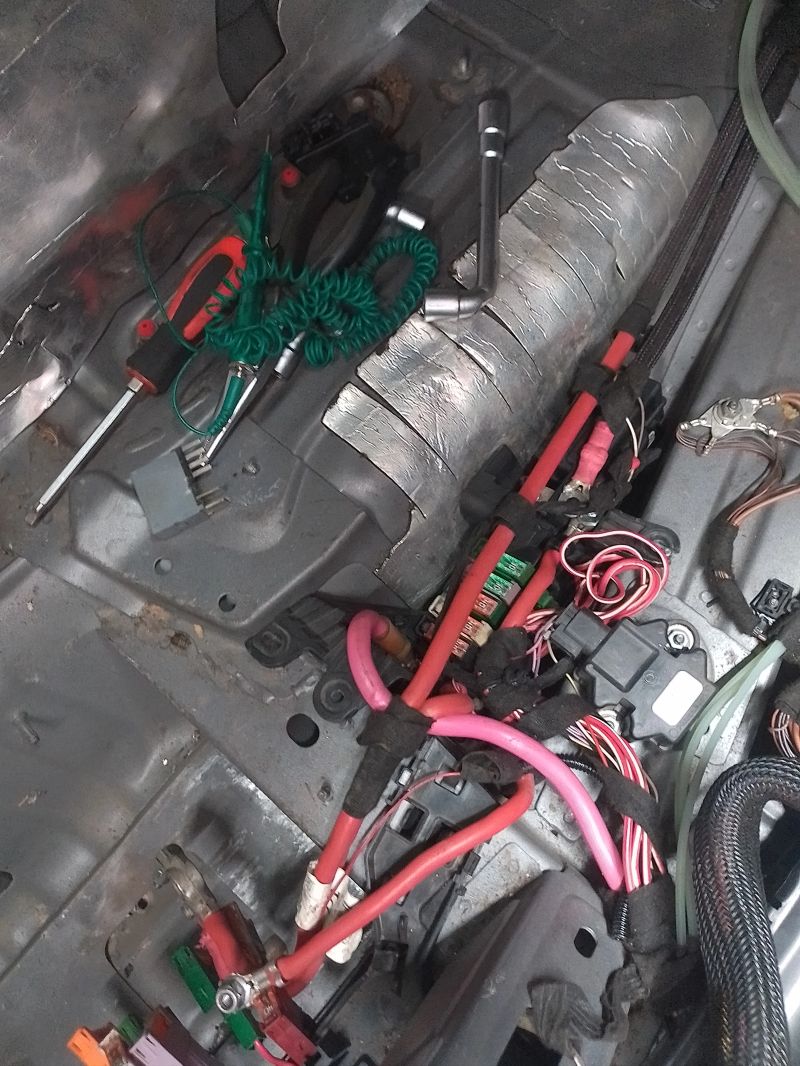
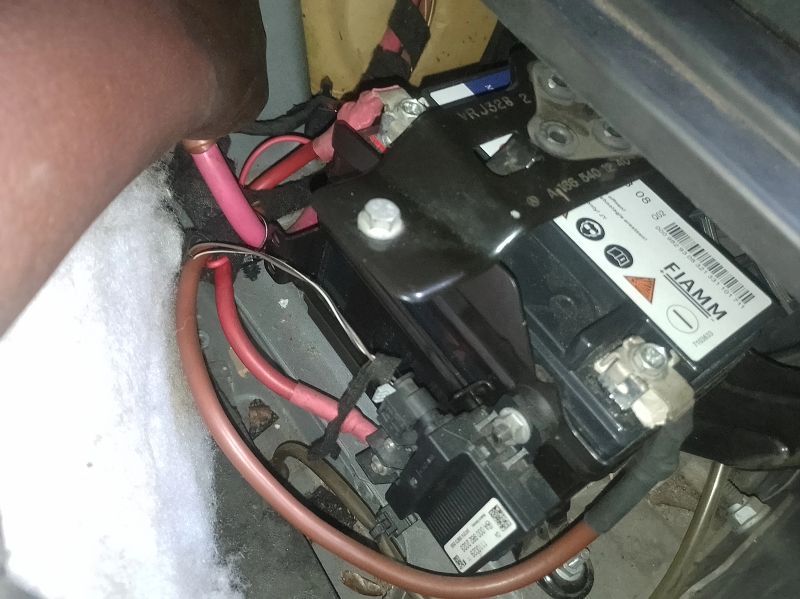
Dual Battery Power Distribution Junction
POWER FLOW 📷 3 Workshop Photos
2015 Mercedes-Benz GL450 Electrical & Power

Completely dead vehicle. No instrument cluster lights, no ignition click, key fob totally unresponsive.

✕ Avoided: No SAM units or computers replaced
The Costly Guess: Assumed dead main AGM battery or fried Front SAM / Central Gateway module.
Physical Test: Tested current flow and battery disconnects; discovered the small auxiliary battery was attempting to power the entire vehicle's electrical load.
Real Cause & Fix: A misrouted primary power cable through the starter-alternator relay bypassed the main battery supply hierarchy. — Corrected the power supply cable routing back to Mercedes factory schematic specifications. Vehicle powered up and started immediately.
The Physical Diagnostic Trail
1
Vehicle Intake & Symptoms:

Completely dead vehicle. No instrument cluster lights, no ignition click, key fob totally unresponsive. (W166 Chassis).

2
What Others Guessed (The Expensive Trap):

Assumed dead main AGM battery or fried Front SAM / Central Gateway module.

3
The Physical Test Performed:

Tested current flow and battery disconnects; discovered the small auxiliary battery was attempting to power the entire vehicle's electrical load.

4
The Verified Zero-Waste Fix:

Corrected the power supply cable routing back to Mercedes factory schematic specifications. Vehicle powered up and started immediately.

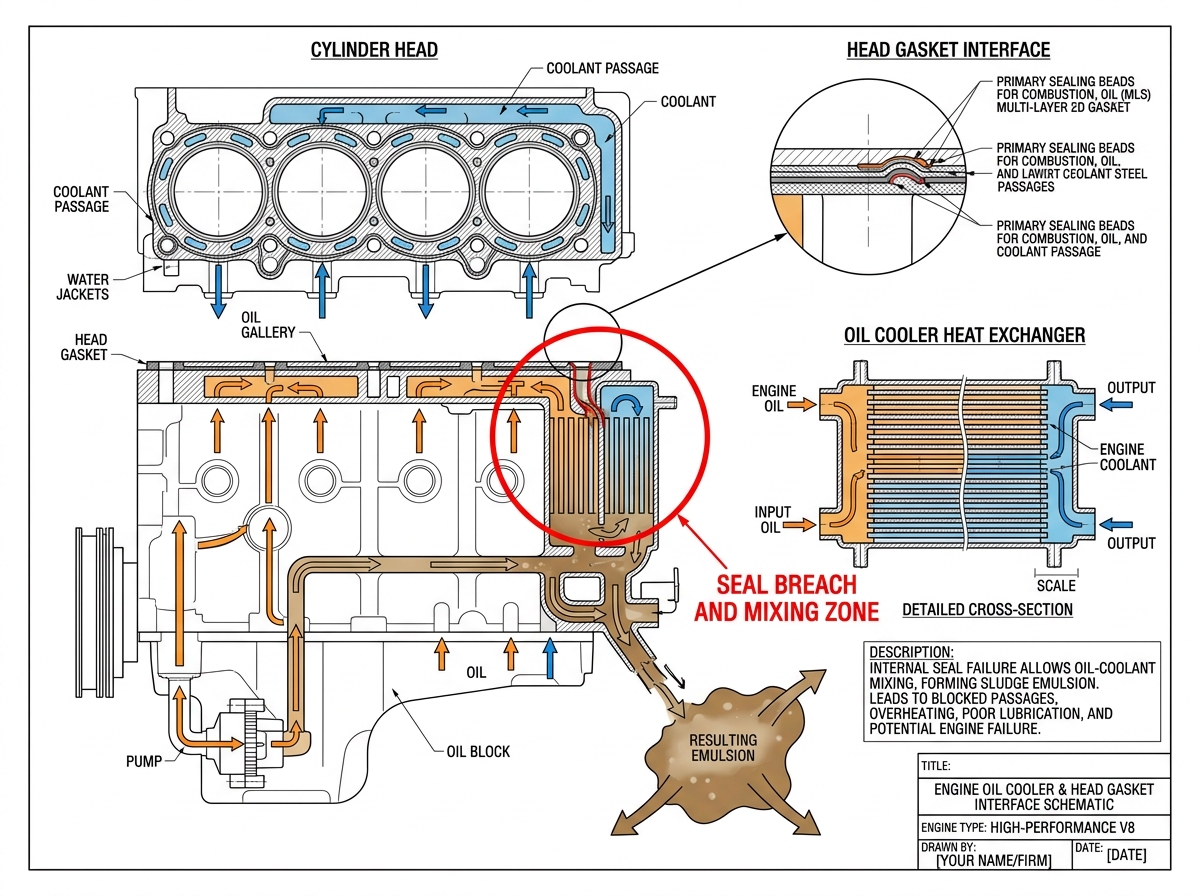
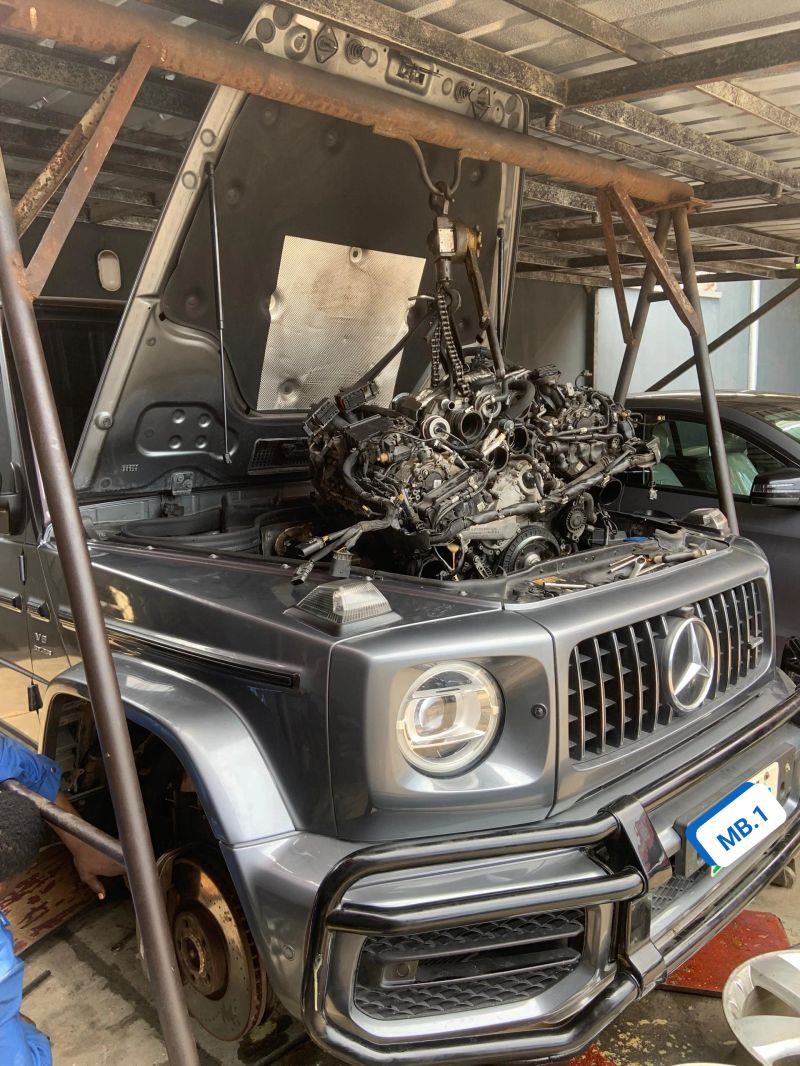
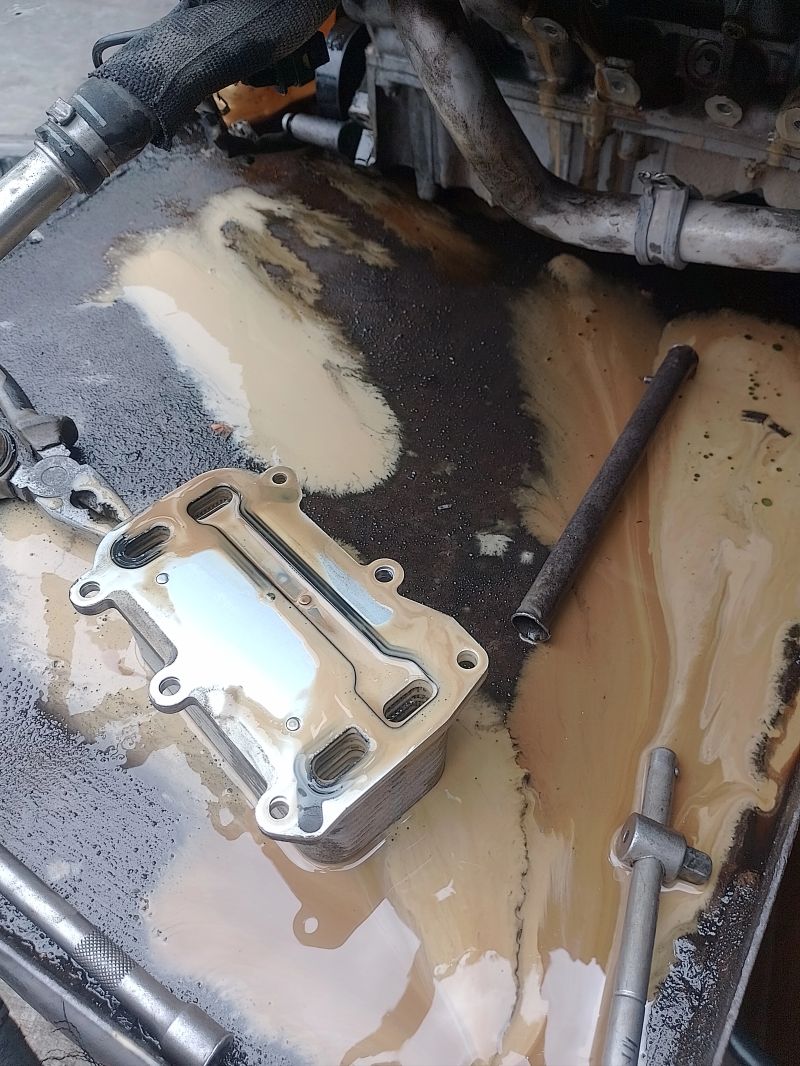
M177 Oil Cooler & Gasket Interface
CYLINDER INSPECTION 📷 3 Workshop Photos
2019 Mercedes-Benz G63 AMG Engine & GDI

Engine overheating; coolant reservoir filled with thick, milky oil-coolant emulsion.

✕ Avoided: Avoided unaddressed catastrophic engine seizure
The Costly Guess: Previous shop replaced only the engine oil cooler, expecting that to cure the oil-coolant contamination.
Physical Test: New cooler installed, but engine still ran with a subtle rhythmic misfire. Pulled spark plugs and borescoped cylinder combustion chambers.
Real Cause & Fix: Severe prior overheating had breached the cylinder head gasket, allowing coolant to wash directly into the combustion chambers. — Documented coolant wash in cylinders and prepared engine for comprehensive cylinder head gasket replacement before running under boost.
The Physical Diagnostic Trail
1
Vehicle Intake & Symptoms:

Engine overheating; coolant reservoir filled with thick, milky oil-coolant emulsion. (W463A Chassis (M177 4.0L Biturbo)).

2
What Others Guessed (The Expensive Trap):

Previous shop replaced only the engine oil cooler, expecting that to cure the oil-coolant contamination.

3
The Physical Test Performed:

New cooler installed, but engine still ran with a subtle rhythmic misfire. Pulled spark plugs and borescoped cylinder combustion chambers.

4
The Verified Zero-Waste Fix:

Documented coolant wash in cylinders and prepared engine for comprehensive cylinder head gasket replacement before running under boost.

Passenger Footwell CAN Bus Splice Block
CAN BUS DIAGNOSIS 📷 2 Workshop Photos
2019 Mercedes-Benz GLC 300 CAN Bus & Network

Radiator cooling fan howling at 100% max speed, center COMAND display screen blank, electronic parking brake inoperative.

✕ Avoided: Avoided fan module and COMAND screen replacement
The Costly Guess: Suspected faulty cooling fan control module and dead COMAND head unit.
Physical Test: When cooling fans default to 100%, the engine computer has lost CAN communication with climate/gateway modules. Lifted passenger footwell carpet to inspect CAN distributor.
Real Cause & Fix: A botched windshield replacement had allowed rainwater to trickle down the A-pillar, pooling into floorboard CAN bus splice blocks and corroding pins. — Dried interior floor, de-pinned and cleaned corroded CAN junction terminals, sealed windshield leak. Fan speed normalized and COMAND screen booted immediately.
The Physical Diagnostic Trail
1
Vehicle Intake & Symptoms:

Radiator cooling fan howling at 100% max speed, center COMAND display screen blank, electronic parking brake inoperative. (X253 Chassis).

2
What Others Guessed (The Expensive Trap):

Suspected faulty cooling fan control module and dead COMAND head unit.

3
The Physical Test Performed:

When cooling fans default to 100%, the engine computer has lost CAN communication with climate/gateway modules. Lifted passenger footwell carpet to inspect CAN distributor.

4
The Verified Zero-Waste Fix:

Dried interior floor, de-pinned and cleaned corroded CAN junction terminals, sealed windshield leak. Fan speed normalized and COMAND screen booted immediately.

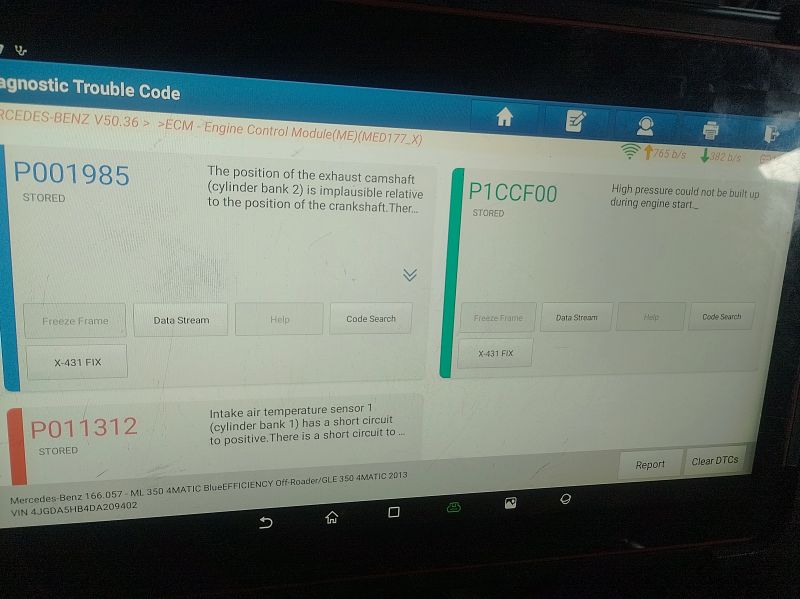
Launch Scanner Fault Codes
40° TDC TIMING 📷 4 Workshop Photos
2016 Mercedes-Benz GLE 350 Engine & GDI

Engine stalls immediately on start with violent camshaft phaser rattle; DTC P001985 exhaust camshaft position implausible on Bank 2.

✕ Avoided: Avoided replacing good replacement camshaft phasers
The Costly Guess: Previous mechanic replaced camshafts and repeatedly guessed at timing marks, confusing Bank 1 and Bank 2 alignment.
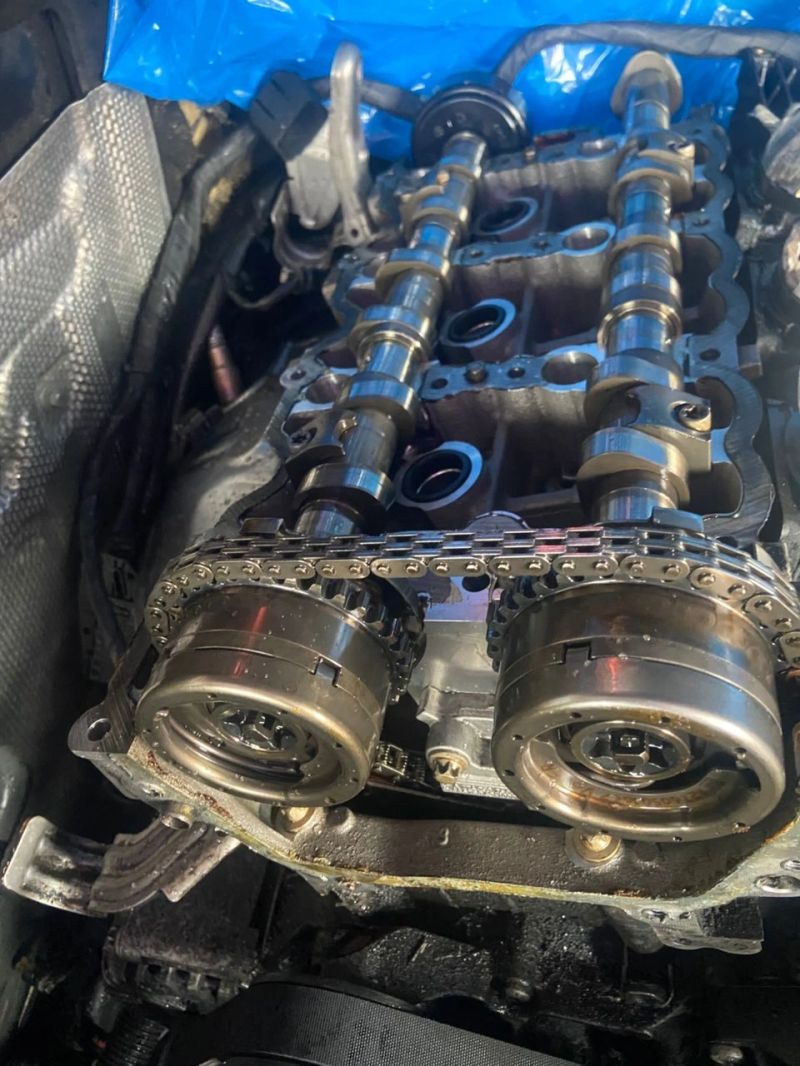
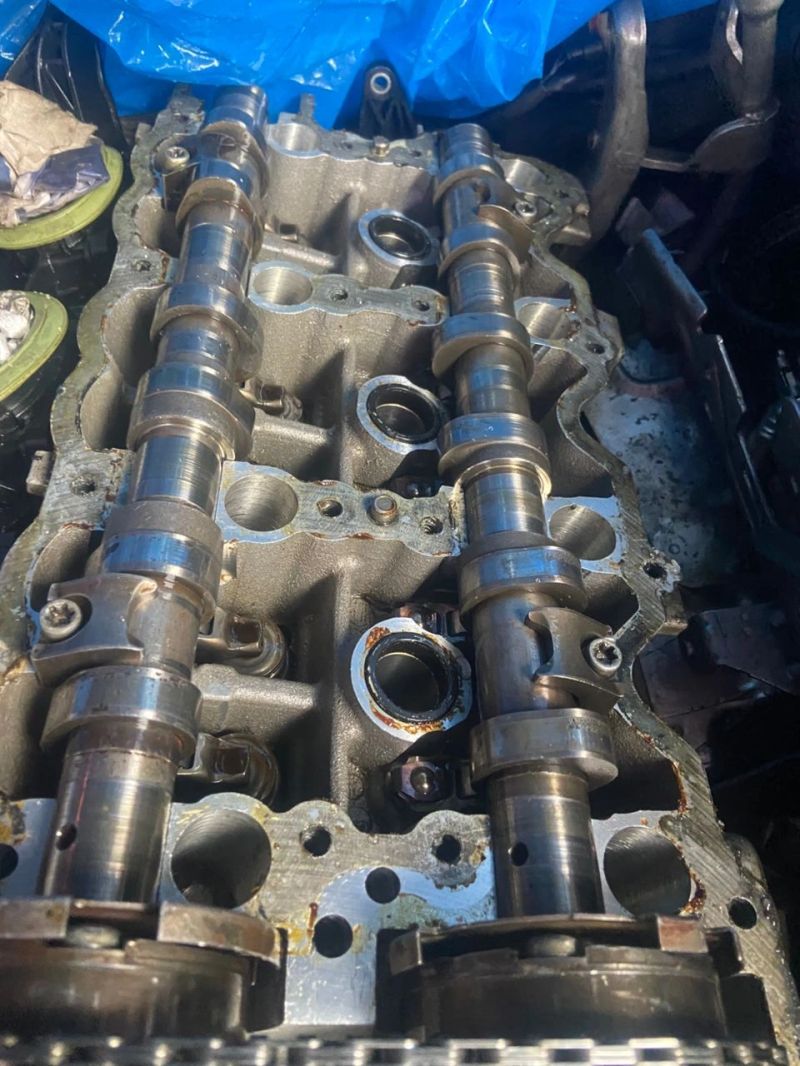
Physical Test: Removed valve covers. Noticed the Bank 2 exhaust cam pulse wheel had been tapped out of position during previous reassembly, skewing mechanical synchronization.
Real Cause & Fix: Cam phaser pulse wheel was misaligned, causing the ECU to detect implausible timing and shut down the engine. — Turned crankshaft strictly to 40° TDC factory mark and reset mechanical timing for all 4 camshafts from Bank 2 to Bank 1 in strict factory sequence. Started on first crank with zero rattle; check engine light extinguished automatically.
The Physical Diagnostic Trail
1
Vehicle Intake & Symptoms:

Engine stalls immediately on start with violent camshaft phaser rattle; DTC P001985 exhaust camshaft position implausible on Bank 2. (W166 Chassis (M276 V6)).

2
What Others Guessed (The Expensive Trap):

Previous mechanic replaced camshafts and repeatedly guessed at timing marks, confusing Bank 1 and Bank 2 alignment.

3
The Physical Test Performed:

Removed valve covers. Noticed the Bank 2 exhaust cam pulse wheel had been tapped out of position during previous reassembly, skewing mechanical synchronization.

4
The Verified Zero-Waste Fix:

Turned crankshaft strictly to 40° TDC factory mark and reset mechanical timing for all 4 camshafts from Bank 2 to Bank 1 in strict factory sequence. Started on first crank with zero rattle; check engine light extinguished automatically.

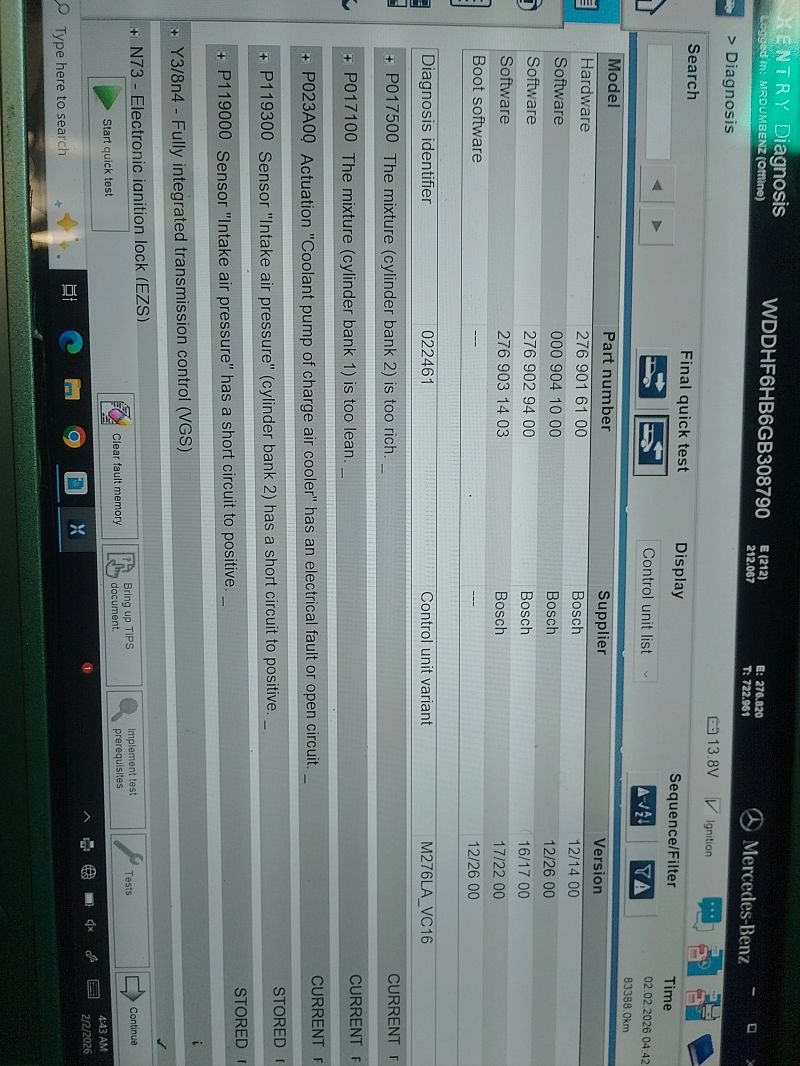
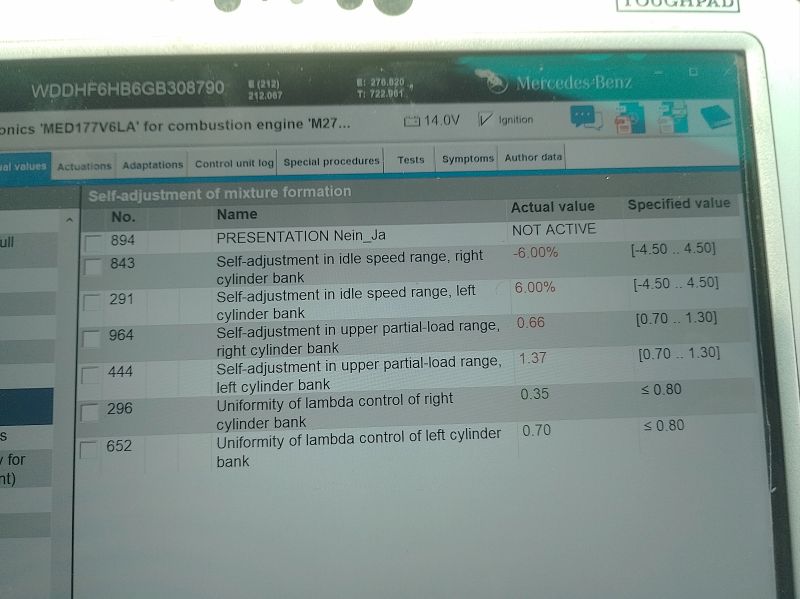
XENTRY Quick Test Mixture Faults
LIVE FUEL TRIMS 📷 3 Workshop Photos
Mercedes-Benz E 400 Engine & GDI

Post-rebuild rhythmic engine shudder. Opposing fuel trim faults stored: P017100 (Bank 1 lean) and P017500 (Bank 2 rich); no misfire codes.

✕ Avoided: Avoided unnecessary bottom-end engine teardown
The Costly Guess: Suspected mechanical bottom-end imbalance or crossed upstream O2 sensor wiring (O2 test did not hold up during road testing).
Physical Test: Connected Toughpad running DAS/XENTRY; monitored live mixture adaptations idling (-6.00% on Bank 1 vs +6.00% on Bank 2). Tested individual cylinder fuel delivery on direct injection rail.
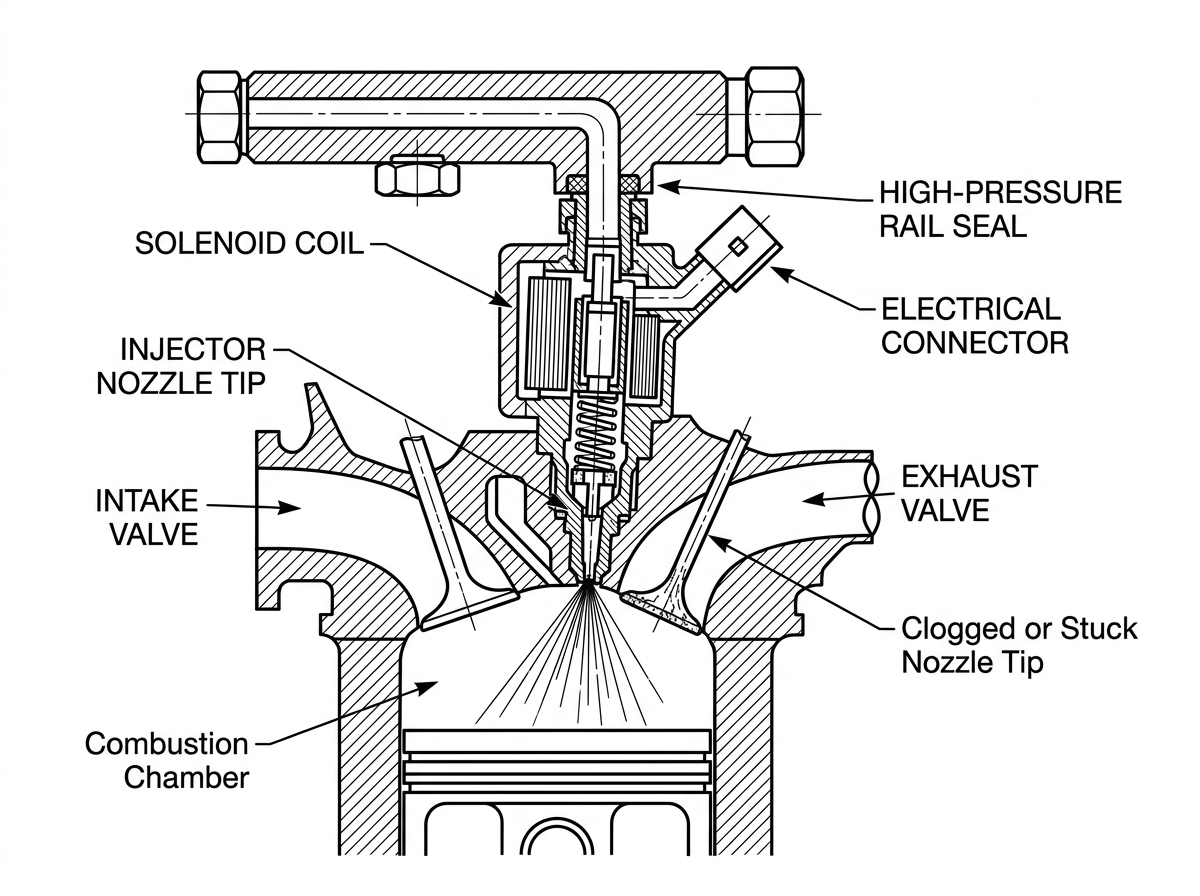
Real Cause & Fix: Dead direct fuel injector nozzle on cylinder 2 failing to atomize fuel properly, causing severe fuel delivery imbalance that scattered ECU fuel trims across both banks. — Replaced the dead fuel injector nozzle on cylinder 2 with a new OEM direct injector and executed complete mixture adaptation reset in XENTRY. Fuel trims stabilized at 0.00%; engine delivered smooth twin-turbo power.
The Physical Diagnostic Trail
1
Vehicle Intake & Symptoms:

Post-rebuild rhythmic engine shudder. Opposing fuel trim faults stored: P017100 (Bank 1 lean) and P017500 (Bank 2 rich); no misfire codes. (W212 Chassis (M276 Biturbo)).

2
What Others Guessed (The Expensive Trap):

Suspected mechanical bottom-end imbalance or crossed upstream O2 sensor wiring (O2 test did not hold up during road testing).

3
The Physical Test Performed:

Connected Toughpad running DAS/XENTRY; monitored live mixture adaptations idling (-6.00% on Bank 1 vs +6.00% on Bank 2). Tested individual cylinder fuel delivery on direct injection rail.

4
The Verified Zero-Waste Fix:

Replaced the dead fuel injector nozzle on cylinder 2 with a new OEM direct injector and executed complete mixture adaptation reset in XENTRY. Fuel trims stabilized at 0.00%; engine delivered smooth twin-turbo power.

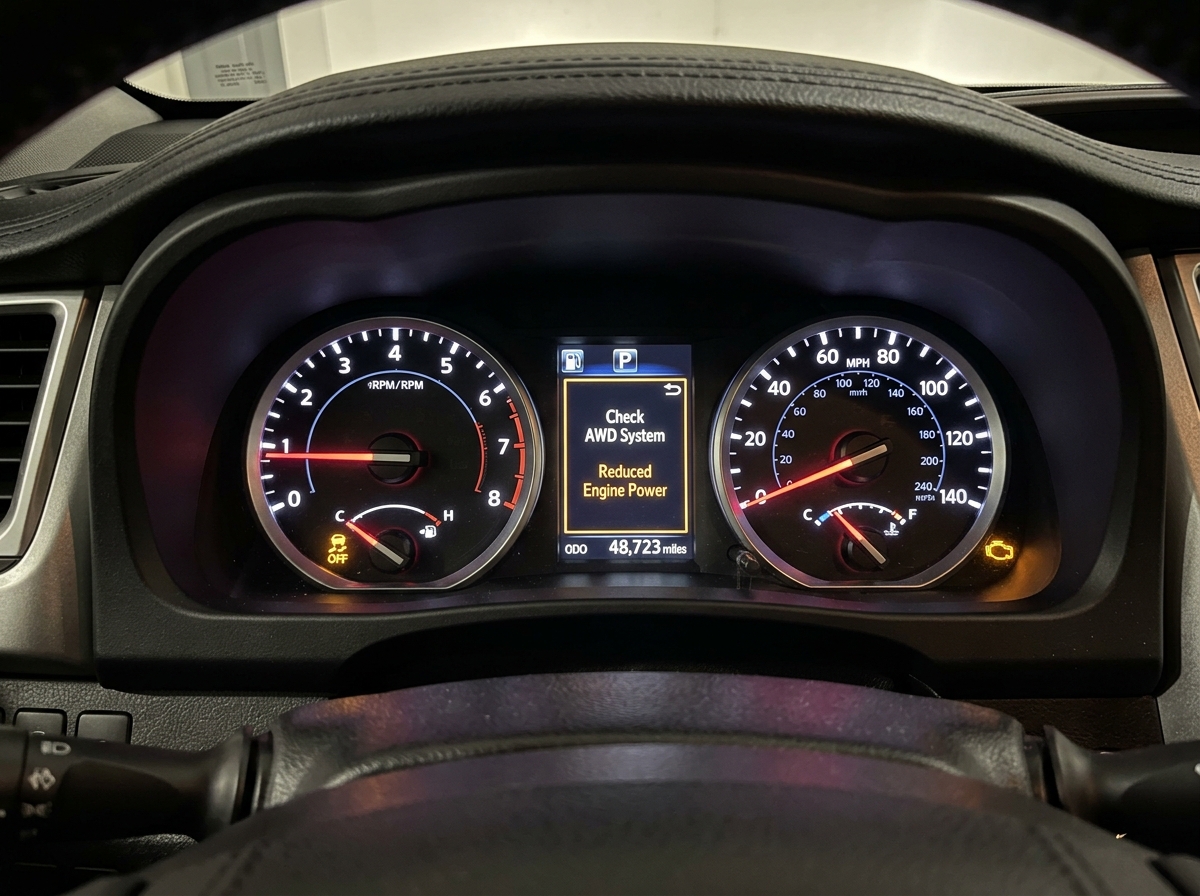
Highlander Instrument Cluster Warnings
LIVE ABS DATA 📷 3 Workshop Photos
2017 Toyota Highlander AWD ABS & Stability

"Check All Wheel Drive System", Reduced Engine Power, Traction Off, and Check Engine light all illuminated simultaneously.

✕ Avoided: Avoided replacing rear differential and AWD coupling
The Costly Guess: Technicians saw "Check AWD System" and assumed catastrophic failure inside the rear differential or electronic transfer coupling.
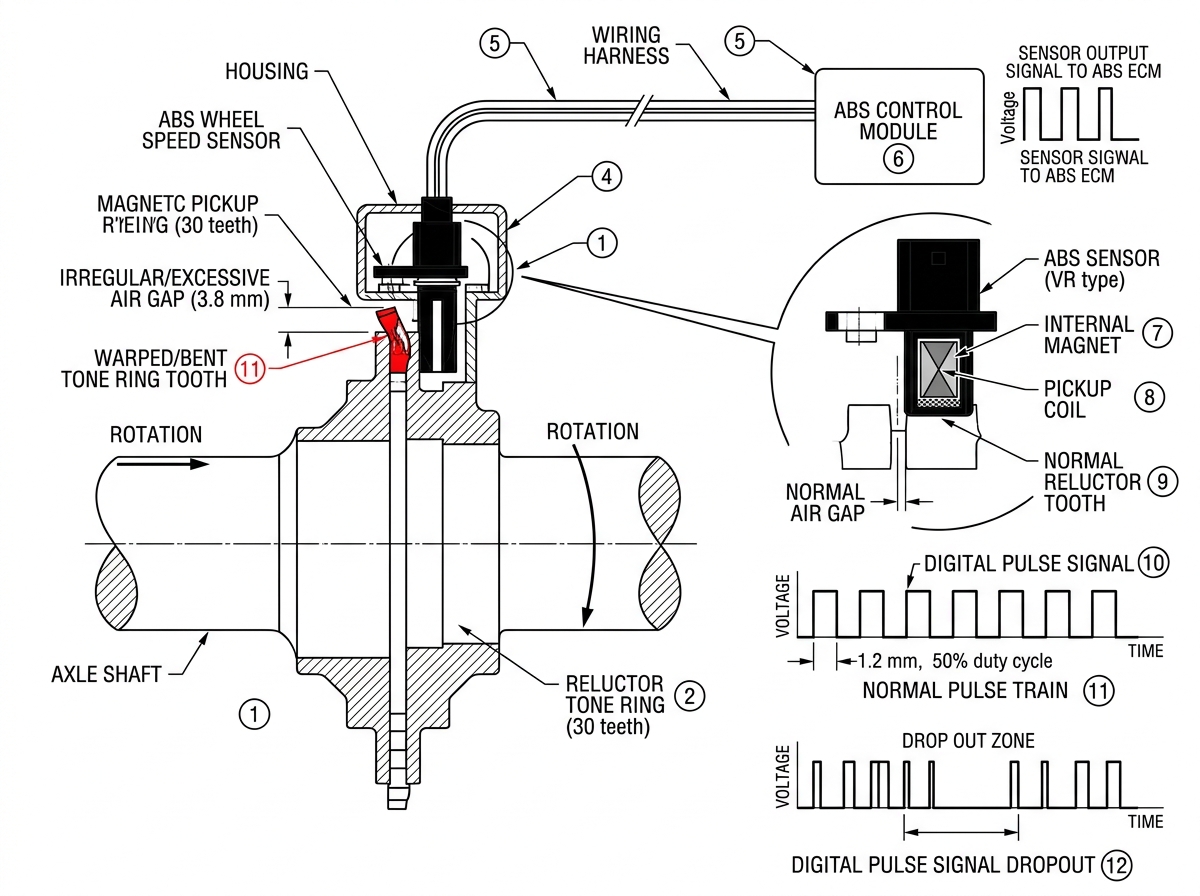
Physical Test: Scanned ABS/AWD module: retrieved code C1280 (Engine Control Fault), indicating AWD was disabled merely due to engine limp mode. Traced ECM code P107A15 to fuel rail. Watched live wheel speed data during road test.
Real Cause & Fix: Two completely independent faults: a broken wire at the fuel rail pressure sensor triggered engine limp mode (which shut down AWD), and a physical warped reluctor tone ring on the axle caused digital ABS speed dropouts. — Spliced and heat-shrinked the broken fuel rail sensor wire; mechanically straightened the axle reluctor tone ring to restore factory magnetic air gap. All warning lights cleared permanently.
The Physical Diagnostic Trail
1
Vehicle Intake & Symptoms:

"Check All Wheel Drive System", Reduced Engine Power, Traction Off, and Check Engine light all illuminated simultaneously. (Highlander AWD).

2
What Others Guessed (The Expensive Trap):

Technicians saw "Check AWD System" and assumed catastrophic failure inside the rear differential or electronic transfer coupling.

3
The Physical Test Performed:

Scanned ABS/AWD module: retrieved code C1280 (Engine Control Fault), indicating AWD was disabled merely due to engine limp mode. Traced ECM code P107A15 to fuel rail. Watched live wheel speed data during road test.

4
The Verified Zero-Waste Fix:

Spliced and heat-shrinked the broken fuel rail sensor wire; mechanically straightened the axle reluctor tone ring to restore factory magnetic air gap. All warning lights cleared permanently.

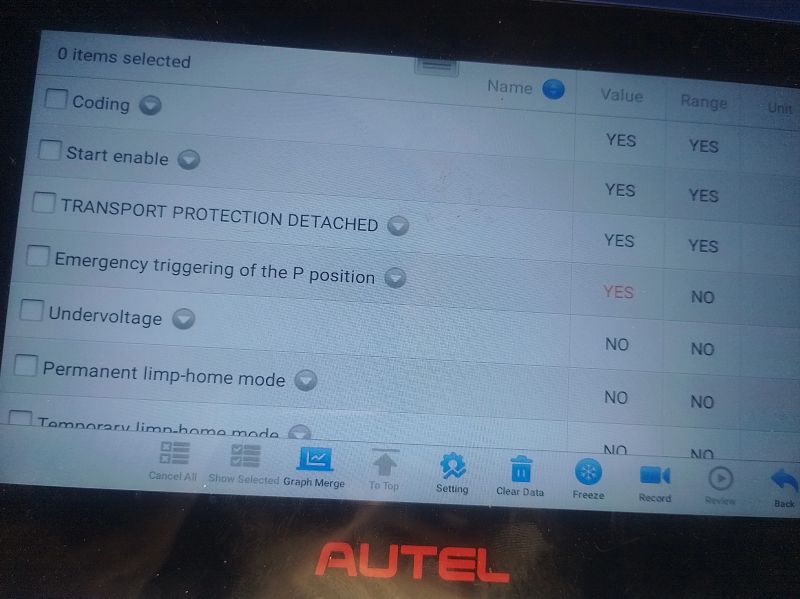
Autel ISM Live Data Screen
CAN PIN TEST 📷 3 Workshop Photos
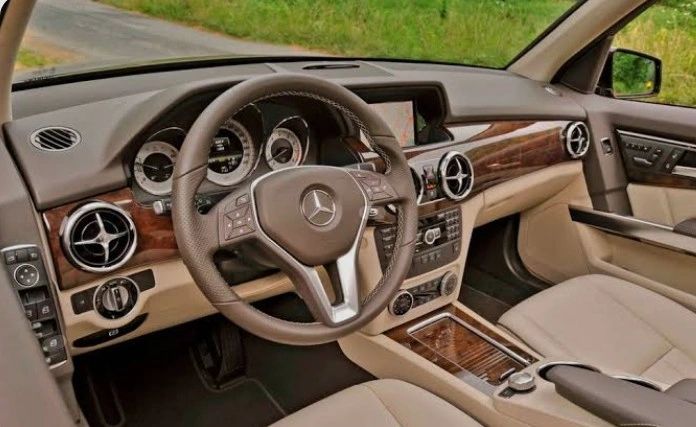
2014 Mercedes-Benz GLK 350 Drivetrain & Transmission

Mobile call for reported "no-start". Engine started cleanly, but transmission gear selector was locked completely in Park.

✕ Avoided: Avoided transmission valve body and ISM replacement
The Costly Guess: Owner and previous technicians suspected internal transmission mechanical seizure or broken steering column shifter stalk.
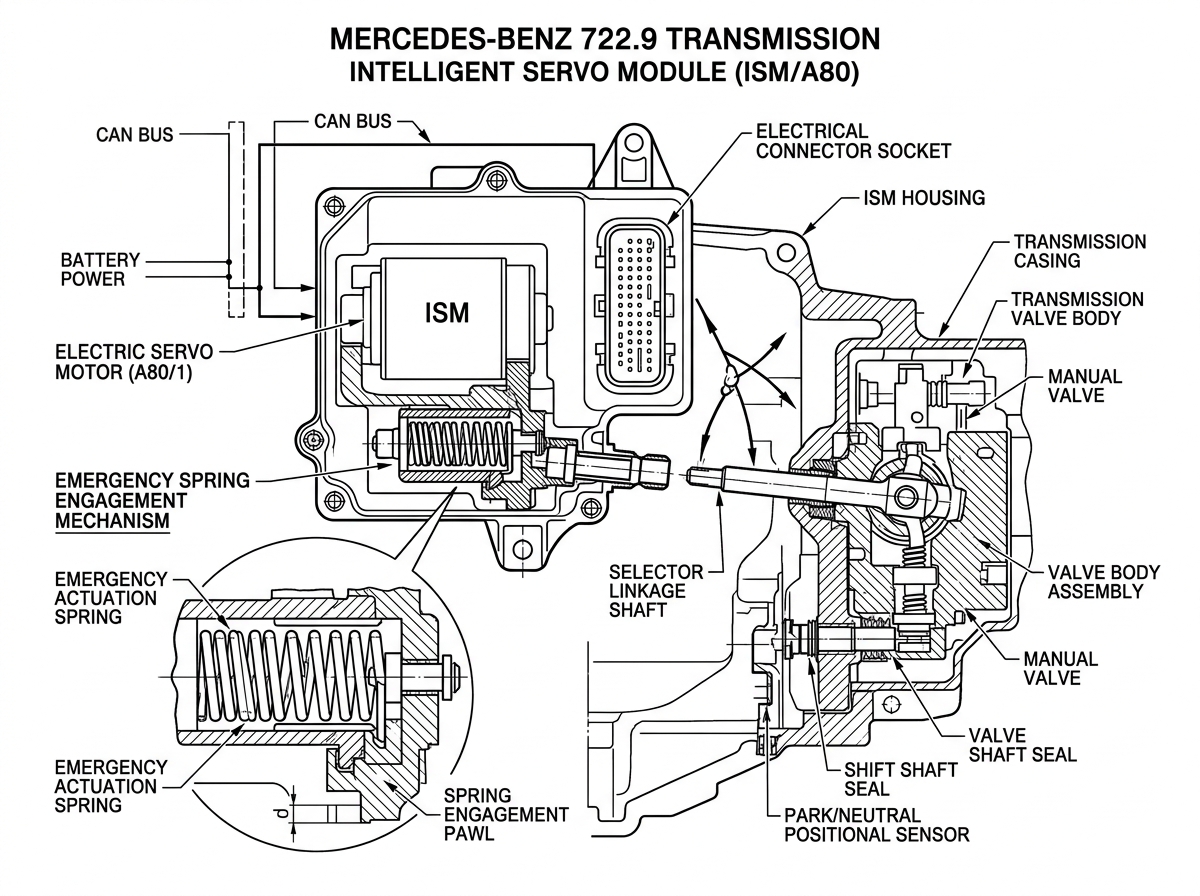
Physical Test: Zero power on OBD Pin 16. Jumped 12V into DLC to establish scanner communication; heard ISM double-knock under car. Autel showed: "Emergency triggering of P position: YES".
Real Cause & Fix: Green moisture corrosion on a 6-pin floorboard CAN bus connector under driver carpet prevented shift verification handshake. — Cleaned corroded connector terminals, restored wiring continuity, and executed an ISM shift adaptation relearn. Gear selector engaged smoothly between P, R, N, and D.
The Physical Diagnostic Trail
1
Vehicle Intake & Symptoms:

Mobile call for reported "no-start". Engine started cleanly, but transmission gear selector was locked completely in Park. (X204 Chassis).

2
What Others Guessed (The Expensive Trap):

Owner and previous technicians suspected internal transmission mechanical seizure or broken steering column shifter stalk.

3
The Physical Test Performed:

Zero power on OBD Pin 16. Jumped 12V into DLC to establish scanner communication; heard ISM double-knock under car. Autel showed: "Emergency triggering of P position: YES".

4
The Verified Zero-Waste Fix:

Cleaned corroded connector terminals, restored wiring continuity, and executed an ISM shift adaptation relearn. Gear selector engaged smoothly between P, R, N, and D.

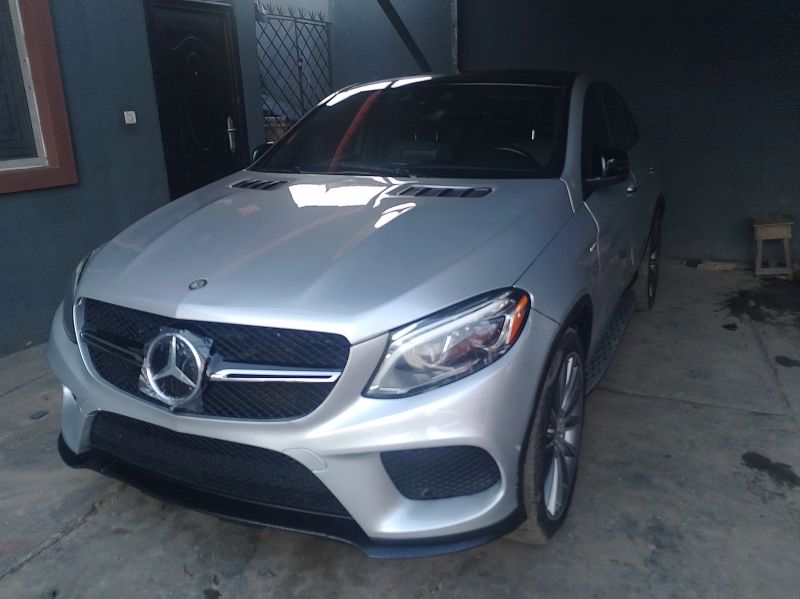
GLE 43 AMG in Workshop Bay
HYDRAULIC PNEUMATIC 📷 2 Workshop Photos
2018 Mercedes-Benz GLE 43 AMG Suspension & Chassis

Violent shift jerk into Drive and Reverse; AIRMATIC suspension pump releases loud puff of air, vibrates violently, and cuts off.

✕ Avoided: Avoided complete transmission and suspension overhaul
The Costly Guess: Suspected internal transmission valve body failure or CAN bus communication corruption.
Physical Test: Inspected transmission pan and found oily film from subtle sump gasket leak. Inspected suspension compressor circuits and strut fittings.
Real Cause & Fix: Low automatic transmission fluid caused hydraulic shift shock; blown compressor fuse, torn upper control arm bushings, leaking 10mm air fitting, and uncoupled pump bracket caused suspension vibration. — Topped ATF to factory level, replaced control arms, replaced blown fuse, resealed 10mm air fitting, and re-aligned pump brackets. Shifts became imperceptible; suspension leveled silently.
The Physical Diagnostic Trail
1
Vehicle Intake & Symptoms:

Violent shift jerk into Drive and Reverse; AIRMATIC suspension pump releases loud puff of air, vibrates violently, and cuts off. (W166 Chassis).

2
What Others Guessed (The Expensive Trap):

Suspected internal transmission valve body failure or CAN bus communication corruption.

3
The Physical Test Performed:

Inspected transmission pan and found oily film from subtle sump gasket leak. Inspected suspension compressor circuits and strut fittings.

4
The Verified Zero-Waste Fix:

Topped ATF to factory level, replaced control arms, replaced blown fuse, resealed 10mm air fitting, and re-aligned pump brackets. Shifts became imperceptible; suspension leveled silently.

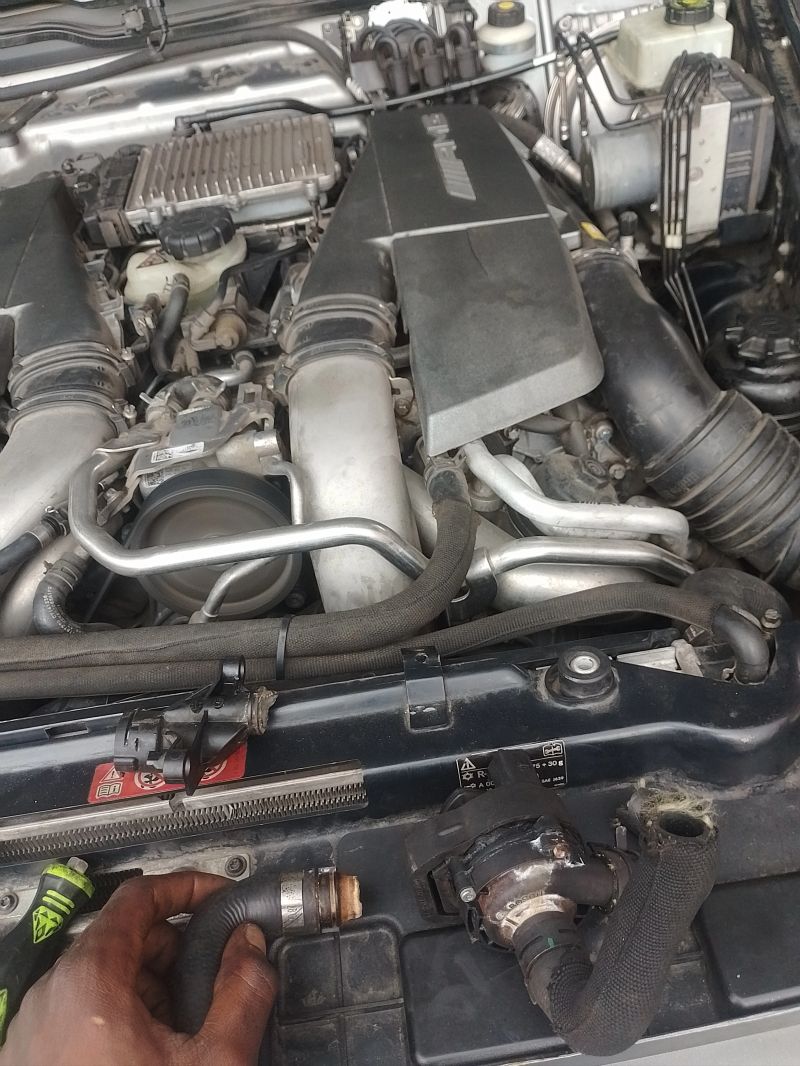
M157 Engine Bay & Decomposed Pipe
PRESSURE TEST 📷 2 Workshop Photos
2014 Mercedes-Benz G63 AMG Engine & GDI

Severe engine overheating; coolant expansion tank completely bone-dry. Fresh coolant poured straight out under vehicle.

✕ Avoided: Avoided repeated roadside breakdowns from unaddressed brittle plastics
The Costly Guess: Expected a simple, single localized hose leak that could be patched in 20 minutes.
Physical Test: Systematically pressure-tested the dual-loop cooling system under progressive operating temperatures and boost loads.
Real Cause & Fix: Cascading thermal and age degradation across aging plastics: decomposed return pipe, failed low-temp aux pump, split radiator fin seam, and burst thermostat hose. — Replaced return pipe, connecting hose, low-temp auxiliary pump, radiator, and thermostat hose. Vacuum-filled and bled dual-loop cooling system. Temperatures held rock-solid under full boost.
The Physical Diagnostic Trail
1
Vehicle Intake & Symptoms:

Severe engine overheating; coolant expansion tank completely bone-dry. Fresh coolant poured straight out under vehicle. (W463 Chassis (M157 V8 Biturbo)).

2
What Others Guessed (The Expensive Trap):

Expected a simple, single localized hose leak that could be patched in 20 minutes.

3
The Physical Test Performed:

Systematically pressure-tested the dual-loop cooling system under progressive operating temperatures and boost loads.

4
The Verified Zero-Waste Fix:

Replaced return pipe, connecting hose, low-temp auxiliary pump, radiator, and thermostat hose. Vacuum-filled and bled dual-loop cooling system. Temperatures held rock-solid under full boost.

Field Tricks That Require Zero Parts

TIP 01 · 30-SECOND CALIBRATION Park Assist & Steering Angle Sync

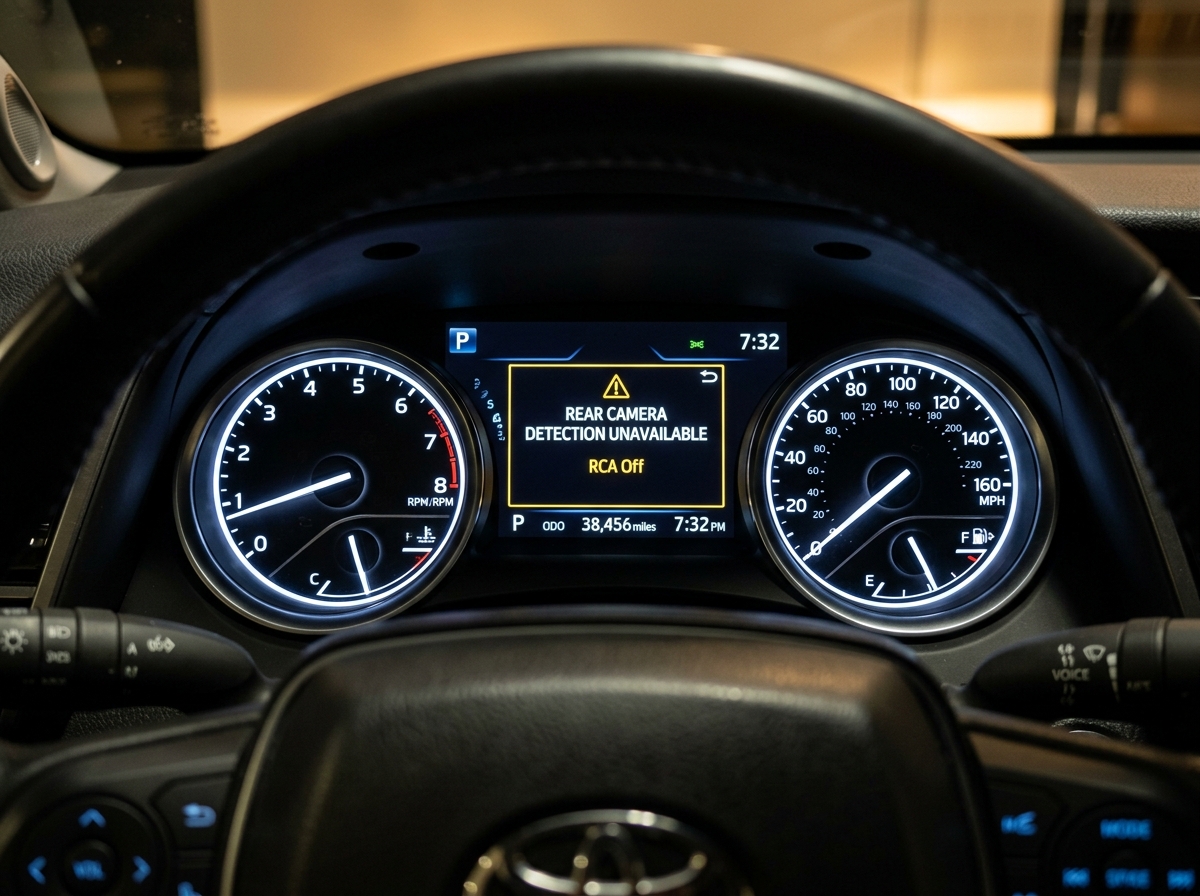
2019+ Toyota Camry: "Rear Camera Detection Unavailable / RCA Off"

When the 12V battery is replaced or disconnected, the reverse camera computer loses its steering angle software sync. The video image appears crystal clear, but the dynamic guidelines freeze and cluster warnings appear with 0 stored DTCs.

The 30-Second Zero-Tool Procedure
  1. Park the vehicle on a level surface with the engine running.
  2. Shift the automatic transmission gear lever into Reverse (keep foot firmly on brake).
  3. Turn the steering wheel smoothly full lock to the left until it stops.
  4. Turn the steering wheel smoothly full lock to the right until it stops.
  5. Return the steering wheel to the dead-center position.
  6. The "RCA Off" warning extinguishes from the cluster immediately, and the trajectory guidelines lock back into active synchronization.

Built for technicians. Shaped by technicians.

Have you resolved a vehicle problem that looked like an expensive parts failure but turned out to be a simple physical defect? Share your diagnostic trail with the OYENA community.